Showing posts with label side dishes. Show all posts

Friday, May 23, 2014

Zucchini Noodles: Better Than You'd Think.

I have a new obsession, and they're called zoodles. Yes, zucchini noodles. My childhood self is watching this all unfold in horror.

Actually, my childhood self would have been pretty psyched to get to use my noodle maker:
It looks like a normal peeler but it has these little teeth. You scrape it across a vegetable (squash type veggies are the most successful, the sweet potato was a disaster), and it creates these awesome noodle shapes. Apparently there are a few different options for noodle makers, but this one was easy and cheap and does the job. See?
  
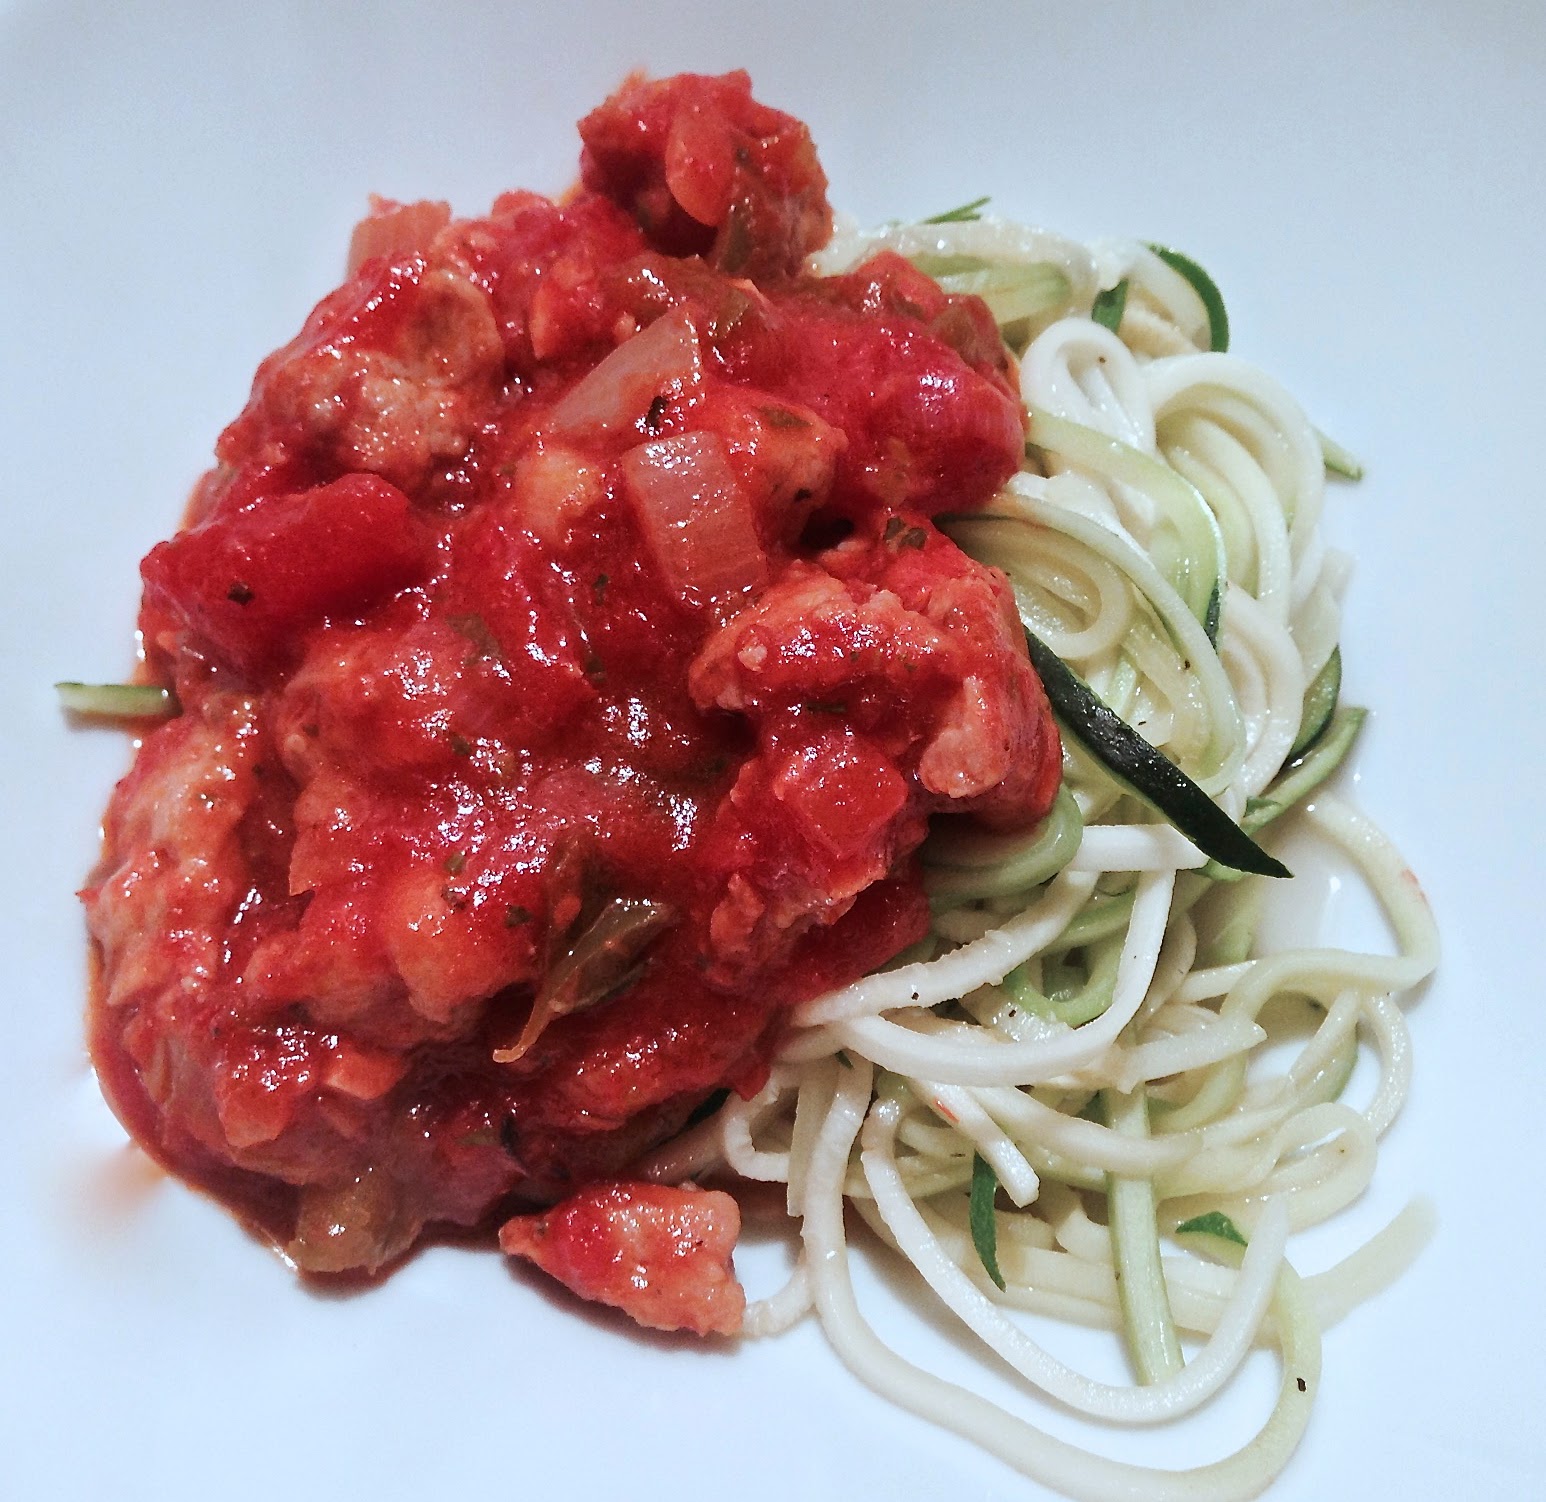
For my maiden zoodle-making voyage, I decided to go basic and just had them with a meat sauce that isn't very interesting in and of itself so I won't even go into it. Use whatever you like. You're going to want to warm up and soften up the zoodles. You do NOT need to boil them. I saute, either in a little water, or in a little oil, just for a few minutes until they are pliable.

Then, top and serve!
You will end up eating more zucchini than you'd expect, and remember that it is very light so you may want to err on the side of a more filling sauce with some protein if it'll be a main dish.

There is definitely more of this to come!


Wednesday, November 20, 2013

Thanksgiving is Coming, and No One Wants Rolls- You Want Sage Apple Cornbread!

Amidst the awesome feast that is Thanksgiving are some slightly less awesome things, including the obligatory dinner rolls. You might not really want it, but you kind of have to have it. I actually had the great fortune to have a cousin marry someone with a delicious family roll recipe, so we are in good shape, but if you're just running past the grocery store at the last minute, this might improve things a bit.

(ignore the beans. cornbread is one thing, but cold bean salad for Thanksgiving is just crazy)

These rolls have all the flavors you're looking for in something for Thanksgiving- sage, corn, seasonal apples, it's perfect! 

Tuesday, November 19, 2013

Thanksgiving is Coming, and You Want THIS Awesome Fresh Cranberry Ginger Relish

When you think of cranberry sauce, do you think of a gelatinous mold, still shaped like the can? Do you think of something that you take a tiny obligatory amount of and then leave secretly on the plate?

Well, feast your eyes on this...

What's that? fresh, vibrant, tart, delicious cranberry lemon ginger relish.

I got the idea from my Mom, who sent me this recipe, which is actually a little bit similar to our traditional family recipe. The family recipe for cranberry salad is based on the same general idea but also involves raspberry jello. Yes. I said jello. It is a gloriously 1950's fandango of a recipe and I could eat it 365 days a year. This, however, is a little easier, does not involve a jello mold (or, cooking sherry!), so is a little less controversial, and tastes awesome. I modified it from the original version, in part out of a lack of candied ginger, which the original calls for.

Here is my version:
-1/2 package fresh cranberries (the other half went into pumpkin scones!)
-1 granny smith apple
-1/4c unsalted almonds
-a plug of fresh ginger, about 2 inches long
-zest of one lemon
-1/4 c sugar (let it sit a bit, add more if you like).

Basically, just chop up each big ingredient (apple, cranberries, almonds) in the food processor. Do NOT process too long- you want some texture, here. For the ginger, peel it, and first chop it up as well as you can- those fibers won't really get food processed that easily. Then throw it in while you chop the berries so it can get a bit finer.

After you combine it, let it sit for a few hours for all of the flavors to meld.

This stuff is really good- the combo of the ginger and the lemon and the tart fresh berries is so good. The apples add a little sweetness (which is why I cut the sugar in half) and some crunch. This gives all the cranberry goodness you could want, without any of the corn syrup or other bad stuff that comes in the prepackaged sauce. 

You could eat this with turkey, or just go hard core and eat it in a salad, which is what I've been doing all week!


Thursday, June 21, 2012

A Sweet Side Dish- Banana Curry

Sometimes I run across a recipe for something and I just know that I have to make it immediately... banana curry was one of those things. It just sounds so WEIRD, you know? 

Well, it was a little bit weird, but it was also a really unique side dish, and I think the sweetness makes it an especially great side for something spicy. 

(You may note I'm not giving you the recipe for the chicken, and that's 
because basically it was ok but nothing particularly special).

This recipe came from Manjula's Kitchen, my go-to source for Indian food. 

What you need:
3 bananas, sliced into pretty thick slices (you don't want them to just turn into mush)
1 tbsp vegetable oil (coconut oil might have also been good)
1/2 tsp whole cumin seeds
1/8 tsp asafetida (hing) (if you don't have this, you could add a little bit of garlic)
1 minced jalapeño (if it's a big one, just use half)
1/8 tsp tumeric
1-2 tsp chopped ginger
1/2 tsp salt
1/2 tsp brown sugar (or mango powder if you have it)
a little water (~2 tbsp)
chopped cilantro, 2-4 tbsp

What to do with it:
(Note: this all comes together really quickly so have everything ready)
Heat up the oil, and when it's hot put in the seeds until they start popping, at that point add the asafetida, turmeric, and jalapeño. Stir it around, then put in the banana, ginger, sugar and water and stir really gently. Don't cook too long, just enough to quickly cook the bananas through, then remove from heat, sprinkle with salt, and gently stir in cilantro. And... that's it!

Even if you're not a meat eater, I think this would be pretty sweet and light for a main course (I mean, there is pretty much no protein), but it's great as a side dish and it's so quick together it's definitely worth a try!

Saturday, November 19, 2011

Thanksgiving: Veggies!

Ok, I know that vegetables are not usually the focus of Thanksgiving dinners. In my own family, we refer to the lone (non-mashed and full of cream) vegetable as "the green vegetable" and it's kind of a bummer if that's what you get assigned to bring. However, veggies get a bad rap, and there are a lot of ways to make some pretty festive side dishes. Here are a couple veggie side dishes from the archives that may be holiday appropriate.

Rosemary Roasted Beets
The caveat with this recipe is that it is the very thing that cemented the fact that I just flat out do not like beets (note the piles of feta with which I tried to camouflage the actual beets for myself). However, I can recognize that it is a good recipe, because I liked it better than all my previous beet experiences. I also think this is a pretty unique flavor combination for a beet dish, which makes it seem kind of special and holiday-ish. The roasted beets smelled amazing, and I think the rosemary flavor would nicely complement other Thanksgiving dishes. If you are a member of a beet loving family, this may be for you!
http://yellowfishblog.blogspot.com/2011/07/beet-bonanza.html

Cherry Walnut Spinach
Originally I served this with Israeli couscous, but I think on its own it would make a nice side dish. The cherries make it seem festive, but it's not actually that much work (which is the balance you're trying to strike, really).
http://yellowfishblog.blogspot.com/2010/08/cherry-walnut-spinach-with-israeli.html

Sautéed Walnut Brussel Sprouts
This is a good dish for a holiday meal, because it doesn't use valuable oven space, and can be cooked really quickly right before everything is served. Now, your childhood self might be revolting at the thought of brussel sprouts, but really, I promise, these are delicious.
http://yellowfishblog.blogspot.com/2009/12/super-easy-walnut-brussel-sprouts.html


Wednesday, August 24, 2011

Oh, Zucchini.

I'm sorry to have been such a delinquent hostess around these parts... I was on a lovely vacation, which has been followed by what can only be described as a data analysis frenzy. As a result of said frenzy, by the time I finish for the day the last thing I want to do is look at my laptop, I'd rather do more important things like pander to Charlotte's whims and watch the first season of Game of Thrones. You know, the important stuff.

At any rate, boy do I have a lot of backlogged recipes for you! To get through them, I might get a bit thematic... so today's post is brought to you by our old summertime friend, zucchini.

Zucchini #1
First, I'm going to tell you how to make the best grilled zucchini ever. You might be thinking "meh, I know how to grill zucchini" and planning to skim right past. But, do you really want to be making sub-par grilled zucchini for the rest of your life? Do you? I didn't think so. Fortunately, it's super easy, and only has 1 secret ingredient.
Here's what you do... take your zucchini and slice into appropriate sized pieces- small enough to cook through, big enough not to fall through the grill slats. Coat with olive oil, sprinkle with sea salt, pepper and... tumeric! It's the tumeric that does it. Much like when I used it in eggs, it doesn't give an aggressive flavor, but rather just adds another subtle level of taste that really really makes it delicious. Try it!

Zucchini #2
This recipe was borne of a need to put something together fast out of the things in my kitchen, but was actually delicious. It was inspired by this Egyptian style spicy couscous recipe, but here is my version.

The Stuff:
1c couscous
2c water
1 tbsp olive oil
1/2 large onion, chopped
1 zucchini, chopped
1/3-1/2c carrots, grated
1/2 tsp corriander
3/4 tsp cumin
pinch cayenne
2 cloves garlic, chopped
1/8c water
1 can drained and rinsed garbanzo beans

What to do with it:
Prepare couscous as usual (either according to package directions, or just boil the water, pour in the couscous, turn off the heat, cover, and let sit).

Heat oil, sautee onions, zucchini, and carrots until soft; add garlic, cayenne, cumin and corriander. Stir in beans, and add the extra water so the mixture is moist. Mix in with couscous, and there you go!

This was so simple, really flavorful, came together quick and reheated really well for lunch- what else can you ask for? Plus it's vegan, if you're into that kind of thing. Well worth a try!

Monday, July 11, 2011

Simple Summer Chicken and Corn

This is an easy and delicious dinner perfect for summer...

First, the chicken... for this, you can use my tried and true ziplock baggie approach. Here is what you need:
-3 thawed chicken breasts (or, however many you need)
-juice of one fresh lime
-1 tbsp olive oil
-1 tsp cumin
-1/4tsp chili powder
-big pinch of salt.

Throw it all in a gallon sized ziplock baggie. Push out as much air as possible and seal- then kind of squish it around with your hands so the marinade is mixed well and contacts all the surfaces of the chicken. Let marinate in the fridge for an hour. Don't let this marinate for too long, because the acid in the lime juice has the potential to make the chicken break down and get mushy. Then, just toss on the grill!

The corn is one of my favorite ways to eat fresh corn (technically, you can make it with canned corn, but it really isn't the same).
-4 cobs fresh corn, kernels cut off
-1/2 small red onion, diced
-1 jalapeno, seeded and diced
-1 small tomato, diced (again, must be fresh)
-about 1/4c fresh chopped cilantro
-(here I had one can well drained and rinsed black beans, but that was just to add protein in case I ate it for lunch during the week, I recommend trying it first without them. If you do use them, add them with the corn).
-2 tbsp butter, or butter substitute
-1/4c seasoned rice vinegar
-cooking spray
-black pepper

Cook the jalapeno and onion in the cooking spray until soft, then add the tomatoes, and cook until lightly cooked through. Pour in fresh corn kernels, vinegar, and butter and saute briefly (about 5 min, you really want the corn to be fresh and crisp- you barely need to cook it). Turn off the heat and add the cilantro, serve immediately.

This can be a side dish for almost any light summer meal, especially one that is grilled- fish, chicken, steak... all of them would be delicious!

Wednesday, July 6, 2011

Beet Bonanza

In a recent CSA box, I got a really nice bunch of beets, greens and all. Now, I come from a Scandinavian, beet eating family, but I myself have never been a beet lover. I've never really been sure if that was because I'm just not into pickled beets, or canned beets (I never remember seeing an actual raw beet). So, I figured that this was the time to find out.

My plan was to use both the beets themselves and the beet greens in separate dishes. I found a good looking basic recipe to start from, got a few additional ideas, and went from there.


The beets themselves:
-beets, peeled and sliced (I had 4 beets total)
-olive oil
-fresh chopped rosemary
-salt/pepper
-crumbled feta

Preheat the oven to 350. Toss the beet slices (being careful not to turn yourself and everything around you purple) in the olive oil and chopped rosemary, sprinkle with salt and pepper. Roast in the oven until a knife goes easily through, and the edges are nicely caramelized, about 25 minutes. Before serving, sprinkle with feta.

The greens:
-olive oil (1 tbsp)
-chopped beet greens from your beets
-1/4 chopped small onion
-2 cloves garlic, chopped
-small amount balsamic vinegar

When the beets are nearly done, heat the olive oil in a pan, brown the onion and garlic, and then put in the greens, stirring until wilted. Turn off the heat, and sprinkle with a few drops of balsamic vinegar.

The chicken:
The chicken isn't really the focus of this post, but in case you're curious, I put 2 thawed chicken breasts into a ziplock bag with some chopped rosemary, 2 tbsp olive oil, 2 tbsp balsamic vinegar, salt, and pepper, and marinated for about 2 hours. Then, I put it on the grill while the beets were roasting.

I have mixed reviews on this- the recipes themselves were good- I liked the greens a lot, and the rosemary and feta really complimented the sweetness of the beets. Unfortunately, I still think I don't like beets- they're just too sweet for me. But, if you do like them, I think this is a unique take and a nice flavor combination.

Saturday, July 2, 2011

Ahh... summer.

There are some things not to love about Los Angeles in the summer... those are things like sitting in traffic in the blazing sun. But, one of the most awesome things is the increase in street fruit vendors (maybe they're around all year, but it still feels like a summer thing). You can identify them by their rainbow striped umbrellas, and little carts stacked full of fruit and ice. Usually there is an array of options like fresh mango, watermelon, cantaloupe, coconut, jicama, and cucumber. You ask for what you want, they chop it up right in front of you, and toss it in a bag. Then, the magic happens- they ask you what you want on it, and the only correct answer is chile, lime, and salt (con chile, limon, y sal). This results in a hefty dose of chili powder, a sprinkle of salt, and limes squeezed all over it. All this for five bucks!

Tell me you don't want to stick your fork in that. Seriously, try to make it the whole car ride home without nibbling at every stoplight.

I've actually tried to replicate something similar at home with a fresh pineapple. I sliced up the pineapple, sprinkled with chili powder and salt, and squeezed some fresh lime.
Now, this is a classic combination, and it definitely was delicious although maybe slightly lacking in the magic that happens when you stumble upon a fruit guy and chops, squeezes, and sprinkles the whole thing super fast right in front of you. It is definitely a way to make your summer fruit salad more spunky

Monday, June 20, 2011

Garbanzo Beans and Kale Bake

Now, we enter the phase in which I start to tell you the thrilling tale of how I used up CSA Box #1. I'm just warning you, there were a whole lotta greens in there, so get yourself ready.

This recipe was really good, and suuuuuuuuper easy. You really can't go wrong when there are so few ingredients!


The stuff:
1 onion, quartered and sliced
1 can garbanzo beans (or, white beans) drained and rinsed
4 cloves garlic
a big bunch of kale, rinsed, big stems removed, and chopped
Parmesan cheese- better quality is better, but all I had was the finely grated kind.
(also olive oil, salt, pepper)

What to do with it:
Take a 9x13 pan, dump the beans, onions, and garlic inside. Sprinkle salt and pepper according to taste (although, watch it with the salt, this starts tasting salty fast), and toss with about a tablespoon of olive oil. It might sound like a lot, but all the other ingredients are low calorie, and using olive oil as opposed to something like cooking spray makes a big difference with such a simple dish. Bake the mixture at 400, stirring occasionally, until the beans and onions are lightly browned. With the garlic and onions, it should smell delicious.

Once the beans are brown, put the kale in the pan, and stir it around. It'll shrink a bit, so don't worry if it looks like a lot. Be sure it is mixes well so the onions, beans, garlic, and oil get their flavor on the kale.  Once it's mixed liberally sprinkle the top with Parmesan cheese (if you want it to be vegan, it'd probably taste fine without it). Continue to bake at 400 until the kale is getting a little bit brown, and it seems softened.
This could make a great side dish, although I ate it as a light dinner just as is! It heated up really well for lunch the next day, too. This is definitely going to be a go-to way to cook greens in the future- it comes together quickly, and the ingredients are things that a well-stocked pantry should have on hand. Give it a try!

Saturday, June 11, 2011

Buffalo Chicken, Oh My!

I actually made this recipe quite a while ago and somehow the picture was lost to the sands of time. Actually, what happened is that my camera battery died, no photos were getting dates on them, and according to my computer I made these on January 1, 1980, when I'm fairly sure I was actually doing something more like watching Sesame Street and getting potty trained, rather than making buffalo chicken potato medallions for dinner with my boyfriend. As proof, I present a picture of myself on July 5, 1980. I am rocking the stylin' striped turtleneck.

But, now back to business. These things are freaking delicious. I found them over at Cara's Cravings, which is a very reliable source of deliciousness. They could easily be an appetizer, but we had them for dinner with some salad.

The first step is to make her buffalo chicken. Now, this was part of the big draw, because I'm always pumped to find some way to use my crock pot, which I still haven't really fully integrated into my cooking life (and definitely haven't fully integrated into my block, because I'm only batting about 50-50 with that thing).

Crockpot Buffalo Chicken:
4 chicken breasts, cut into chunks- mine were still partly frozen
1 medium onion, diced
3 cloves of garlic, minced, or, 3 tsp chopped garlic
1 red bell pepper, diced
3/4 cup Franks buffalo wing sauce (you can use some other sauce, but Franks is pretty classic.
2 tbsp Worcestershire sauce
salt and pepper

Toss it all in there, and cook on low until the chicken is cooked. Mine only took about 4 hours- although that may be a function of the size of my crockpot. Once it's done, shred the chicken with a fork. This stuff was DELICIOUS. Also, I like the fact that it has tons of flavor, but no added fat. After making the recipe I'll show you here, I also used this in a creamy buffalo chicken pasta, a buffalo chicken pizza, and the rest is in the freezer, waiting to be enjoyed once I recover from my buffalo chicken overdose.

Buffalo Sweet Potato Medallions:
1 large sweet potato
crockpot buffalo chicken
crumbled Gorgonzola
olive oil/cooking spray
salt/pepper

Now, these are super easy. Take a big sweet potato (we were having them for dinner, so I picked the fattest sweet potato I can find. the girth of the potato will directly control the portion size, so for appetizers, pick a skinnier potato). Slice it into about 1/4 inch slices. Toss them in olive oil, or coat with cooking spray and sprinkle with salt and pepper. Roast on a tinfoil covered cookie sheet at 425 for 25-30 min, until a little browned, flipping halfway through.

Top each cooked slice with buffalo chicken mixture, and then with Gorgonzola sprinkles. Put the sheet under the broiler to let the cheese melt (about 5 min, depending on your broiler).

Serve either as an appetizer or with a light salad to make it into a main meal. These taste way more decadent than they actually are, give them a try!


Sunday, April 17, 2011

Rosemary Gorgonzola 'Soysotto'

This recipe goes in the "a little bit different" category. I got the idea from a post over at Cara's Cravings, but it turns out it actually comes from Rocco's "Now Eat This!" cookbook, which I actually own and which was the source of the Penne alla Vodka post from a few months back. I think I probably overlooked it in Rocco's book because his version relies on mushrooms, which frankly, I have never managed to get fully on board with. Cara's version involves butternut squash and sage, which I was immediately very excited about, but also called for pecorino romano cheese, which turned out to be a bit strong for me in this dish. So, tonight I made it my own!

Now, you're probably wondering what this whole "soysotto" deal is. Basically, it's risotto, but the general idea is that given how carby and fatty risotto can get, this recipe tries to healthify it (yes, that is a word now) by using textured vegetable protein (TVP) as a base instead of arborio rice. The net result of this is that the dish has higher protein content, lower carbs, and cooks much more quickly. I think it's tasty and satisfying and easy. However, if you are a risotto purist, you're going to want to give this a skip, because it doesn't really have exactly the texture I associate with a truly good creamy risotto. I am not a risotto purist, so I found the texture to be just fine and for me it was a very reasonable substitute.

What you need:
1.5c TVP*
3c chicken or veggie broth
1 tsp (or a clove, chopped) garlic
half an onion
a bit of oil/butter for browning
pepper, to taste
2oz gorgonzola**
fresh rosemary- I used 2 sprigs, each ~4 inches long, and stripped the leaves
3 big handfuls baby spinach, roughly chopped.
1/4c chopped walnuts, toasted

What to do with it:
Chop the onion into strips, brown in the oil/butter of your choice.
Once the onion is translucent and brown, add the garlic and stir for a few minutes.
Pour in about 1/4 a cup of the broth, to deglaze pan.
Put in TVP, stir in the rosemary.
Add half the remaining broth, stir until absorbed.
Add the rest of the broth, let simmer. If it becomes too dry, add a bit of water. It should remain quite moist.
Once the water/broth is fully absorbed - about 10 minutes- (there may be a little  bit at the bottom, thats fine)- turn off the heat.
Stir in the cheese, until melted. Add pepper.
Stir in the chopped spinach, and cover until wilted.
Top with toasted walnuts.

*I used Bob's Red Mill, which I got at Whole Foods- I used to buy it in bulk but haven't found it lately. If you're wondering, one big point in favor of TVP is that it is an incredibly cheap protein source and very versatile. Of course, some people are not in favor of too much soy, but I think as one part of a varied diet it can be fine.
**Now, you might be wondering if you can skip the cheese and make it vegan. Honestly, I don't know if I would- the melted cheese plays a big role in bringing the texture together, and also provides a lot of flavor. If someone gives it a try with a vegan cheese, you should let me know! If you do use a plainer cheese, I'd up some of the other spices/seasonings.


Now, I actually ate this as a light meal all by itself, and it was delicious- it would also be good paired with a simple salad. You could also serve it as a side dish- if you wanted to make it easier (for instance, if you were already serving it with a protein and a vegetable), you could always just make it with just the rosemary and gorgonzola. But, I liked it just as is! I will definitely be making it again.

Monday, November 29, 2010

Afghan Pumpkin- Part I

Once upon a time, I went to an Afghan restaurant in Hartford, Connecticut. I had a dish so delicious, I have spent all the time since (well, not ALL the time, but you know what I mean) wishing that I could have it again. Although this time was almost 10 years ago (aack), the restaurant still exists, the problem is that I'm nowhere near Hartford. The dish was a wonderfully spiced mashed pumpkin dish that continues to haunt my dreams.

In my CSA box, I got a pumpkin.
Slightly daunted, I nonetheless decided to tackle the pumpkin head on. At the point when this photo was taken, I had no inkling of how much pumpkin one medium sized pumpkin actually contains. Let me tell you, it is no joke.

I made some things that you normally make with pumpkin, but with the last half, decided to go out on a limb and pursue my Afghan pumpkin dreams. Now, the first difficulty was, I had no idea what the dish was called. I finally figured out that there is an Afghan pumpkin dish called kadu bouranee. The second difficulty was that, most likely because I have no way of knowing alternate spellings or names, apparently every single person on the internet copied the internet from the same place, because there is almost zero variance in what people are doing out there. The recipe didn't really look right, but without any other options, I decided to carry on.

In a pan, heat 1/8c oil, and brown your cubed pumpkin (I used only about 1/4 of my pumpkin).
 Mix together in a bowl:
-1 teaspoon chopped garlic
-1 cup water
-1/2 teaspoon salt
-1/2 cup sugar
-4oz tomato sauce
-1/2 teaspoon chopped ginger (I used ginger paste)
-1 teaspoon corriander
-1/4 teaspoon pepper

When the pumpkin is lightly browned (not all the way cooked, just started), pour over the tomato sauce:
 Now let it cook down, this will take a while.
To serve on top, make a quick and easy yogurt sauce (this is actually a great versatile sauce).
-3/4c plain yogurt (I used nonfat)
-1/4 teaspoon garlic
-1/4 teaspoon salt
I served this as a side dish, next to a lentil walnut patty (which was pretty good, and I would totally make them again). Now, I just don't know. This was almost like a sweet and sour sauce... it was incredibly sweet, and I actually couldn't really eat much of it. This was obviously a disappointment, given my pumpkin dreams. However... stay tuned for round 2...

Tuesday, October 5, 2010

Squash Fries!

In yet another squash themed post, I present to you a super fast weeknight meal that is truly easy to just throw together in 20 minutes from deciding to do it to eating at the table.

The squash is another in my list of new-to-me summer squash varieties from the CSA box. This one is patty pan, or scallop squash. I'll give it this, it is the cutest one yet- it looks like a cross between a flower and a space ship, and that is something you don't see every day. Also, it has now been in my fridge for almost 2 weeks (in a ziplock bag in the crisper drawer) and it held up beautifully.
I cut it into lengthwise strips, about the size of thick cut french fries. These were pretty large (I think sometimes this variety can be fairly small) so it worked well.
I used just a little bit of my fancy butter (from the coconut cupcakes) since I have to do something with it (2/3 of a pound are in the freezer, for some special occasion, but I have about a quarter of a stick worth sitting around, so why not), a chopped clove of garlic, salt and pepper, and just a tiny sprinkly of dried rosemary. I just pan fried the squash and let it get a little brown. Summer squash and rosemary is one of my absolute favorite combination and is probably the way I most frequently eat it (although, usually it is steamed).

I had this with the now staple food item of Trader Joes chipotle chicken skewers, just because they are so easy! Over all, it was a quick, easy, and 95% healthy dinner. Yum!

Sunday, September 19, 2010

Watermelon Basil Feta Salad

I have been busily working my way through the CSA box. Not everything has photographs, partly because it wasn't all blog-worthy and partly because I had a camera memory card mishap. But, some of the products are...
- a very delicious egg white quiche with zucchini, yellow squash, tomatoes, and basil
-an eggplant and chickpea based curry (with more squash)
-cucumber salad (cucumber and rice wine vinegar)
-sliced cantelope to go with my standard breakfast sandwich (3 egg whites, 1 wheat english muffin, and 1 laughing cow cheese triangle)

This one though, was simple, delicious and managed to escape the memory card debacle intact.
 The stuff:
-1 watermelon
-half a bunch purple basil, half a bunch green basil (basically, a bunch of basil. I'd used the purple basil for a variety of other things, like the quiche and breakfast sandwiches).
-feta cheese crumbles
-a few limes (number varying based on juiciness - I needed 3 because 1 was completely dry)

What to do with it:
Ok brace yourself, this is very technical and demanding.

Cube the watermelon into bite sized pieces. Chop the basil and add. Dump in some feta. Squeeze the limes. Toss... and done!

I served this at a BBQ as a side dish (to accompany my Korean fusion tacos, which are are an infallible crowd pleaser) - it was nice and light and refreshing and just different enough to make it interesting. Delicious!

Sunday, August 8, 2010

Cherry Walnut Spinach with Israeli Couscous

This is an interesting dish, it could be a side dish, or you could serve it over rice or pasta. I chose Israeli Couscous. If you haven't had this, #1 it means that you haven't had my Rosemary Couscous Chickpea Salad, and I'm going to tell you right now that means you are missing out. It is very different than regular couscous (which I also love)- its more like little balls, and has a really fun unique texture.

 What you need...
.25 cup dried cherries
.25 cup chopped walnuts
.5 onion
about 3 garlic cloves, chopped
10oz fresh spinach (baby, probably is best)
olive oil
a splash of chicken/veggie broth, white wine, or more oil
.5 -2/3 cup dry couscous
2oz soft cheese (goat cheese, feta would be best)

What to do with it...
First, start the couscous. Heat up a few teaspoons of oil in a sauce pan and lightly toast the couscous. I made .5 cup for a light dinner that served 2, if you're hungrier, make more. Once its getting brown, put in twice as much water as you had put in couscous, cover, and lightly simmer.

Now, start with the topping. First, heat a few teaspoons of onion and brown the garlic and the onion. Once the onion is about halfway done (so, sort of getting soft, but not brown), toss in the walnuts and the cherries. The walnuts will toast a bit, and the cherries soften and plump up. I put my cherries in right when I put in the onions, and I think they were a bit overcooked.
Now, dump in about half a cup of broth, and let it cook for a minute to get hot and start steaming, then throw in the spinach. If you're making this as a side dish for a bunch of people, put in more- there enough of the onion/cherry/walnut mixture that you could probably have almost twice as much spinach if you wanted. I never cease to be amazed at how much spinach shrinks up.

Once its all cooked toss in the crumbled cheese. Now, I had on my hands some super delicious soft cheese from the kind of friends who come and stay and leave the fridge stocked with multiple super delicious cheeses. Now, the thing is, I think that was a mistake. The original recipe called for goat cheese, and I think they were right- because, my cheese kind of melted away.

This was unique and tasty. I think mine would have been tastier with different cheese and less cooked cherries, but I will definitely be trying it again!


*note- this recipe would be veeeeery easy to make vegetarian (use veggie broth not chicken broth) or vegan (skip the cheese). you could even add small piece of firm tofu to add some protein.

Tuesday, July 13, 2010

Sage Apple Cornbread

So, in addition to lemon cucumbers, my co-gardener across the city has a bumper crop of sage. There is sage drying for burning, and I managed to abscond with some so I could cook something with it.

Most of the things I'm familiar with using sage for are things like my Gnocchi, Sage, and Butternut Squash, which is very wintery and not what you want to make out of your nice summer garden. After a bit of looking around, this is what I landed on:

Apple Sage Cornbread (based on the cornbread recipe on the corn meal box!)
1c cornmeal
1c flour
.25c sugar
1tbsp baking powder
1tsp salt
1c milk (almond milk, around here)
1/3c oil
1 egg

Mix all those ingredients together, as your base mixture, then lightly sauté the following:
half an onion, finely chopped (do this first, it has to cook the most)
about 10 chopped sage leaves
1 cob of corn, kernels cut off
1 apple, chopped finely

Add these to the mixture, bake at 400 for about 20-25 min (8x8 pan).

Simple Sage Bean Salad
This is a nice, simple cold dish that paired well with the cornbread.

1 can white beans, rinsed and drained
half an onion, finely chopped
sage leaves, chopped
fresh chives, chopped
1 roma tomato, chopped (more if you like tomatoes more than I do!)
half a red pepper, chopped
about 2oz gorgonzola

top with oil, balsamic vinegar, salt, pepper. Let sit in the fridge for a while to chill and let the flavors blend.

All in all, this meal was a nice use of some fresh ingredients, and made for a good summer dinner!


Wednesday, June 9, 2010

Grilled Rosemary Chicken with Lemon Almond Bulgur

Well, the cooking around these parts has been a little sparse. I'm working on a grant deadline, which basically means that I'm doing things like cooking mass quantities of chicken and bulgur and then proceeding to eat it for every meal. Fortunately for you, this was some freaking delicious chicken.

Chicken:
-1 ziplock baggie (I swear, this makes a difference)
-juice of 1 lemon (REAL lemon juice, people)
-a few sprigs fresh rosemary (I suppose dry would do, but fresh is exponentially better)
-boneless skinless chicken breasts (despite living alone, I used 4, because of the aforementioned plan to live on it)
-salt, pepper
-garlic (a few cloves, or if you're lazy like me and use the stuff in a jar, a teaspoon)

Bulgur
-1.5 cups dry bulgar
-2.5 cups water
-diced onion (2-3 tablespoons)
-garlic (a few cloves, or 2 tsp)
-red pepper flakes to taste
-chopped toasted almonds (I toasted mine in a dry skillet)
-just enough olive oil to saute the onions
-lemon zest (from the lemon you used for the chicken)- 2 tablespoons
-a squeeze of lemon juice if you have more

Basically, the chicken is the easiest thing ever- I dumped everything in the list in the ziplock baggie, pushed the air out of the bag, and stuck it in the fridge for 3-4 hours. The reason I swear by the baggie is that I think that it keeps the marinade closer to the meat. Also, periodically I go and squish around the meet to rearrange it. When I was ready, I popped it on the grill, and voila! I also tossed some zucchini and onions on the grill as long as it was on, as you can see- really, these could be any veggies you like.

The bulgur is also easy, I love bulgur because it tastes good and has a cous-cous like feel, but is more nutritious. Plus, it cooks incredibly quickly which is always a plus. Basically, saute the onions and garlic in the olive oil until a little brown, then pour in the water and bring to a boil. Once boiling, turn off heat and dump in the bulgur. After 5 minutes, stir in zest and almonds, and make sure that there is still a bit of water to absorb. Let sit 5-10 more minutes, then fluff and serve.

This was simple, and delicious (and, healthy). Of course now I've had about 6 meals out of it in different permutations (it was a lot of chicken) so I'm a little sick of it, but still, it was good! Very light and summery, and I really enjoyed the texture of the almonds in the bulgur and the freshness that the lemon brought.

Thursday, January 21, 2010

Chickpea Tomato Quinoa

Have you gotten on the quinoa bandwagon? (I believe the bandwagon left the station sometime circa 2005, so this is not new news, but I'm still on it so here you go).

Basically, its awesome for you. Its a complete protein. Its high in fiber and protein. And, its yummy. So, there you go. This dish is the perfect package for the quinoa- its hearty and tasty and you could take it in a lot of directions and run.

(the picture turned out badly, so you get this extra jazzy version to make up for it).

-some olive oil
-1 onion, chopped (mine was very small, and it was fine)
-.5tsp cumin
-2 tablespoons corriander/cilantro seeds, smushed a bit with the back of the spoon to break them up
-red pepper flakes
-3-4 cloves garlic, chopped
-1tsp salt
-1c quinoa (I get mine at Trader Joes near the pasta)
-1 can chopped tomatoes (unsalted), including the liquid
-1 and 1/2c broth (I used chicken, you could make it vegan with veggie broth)
-1 can chickpeas/garbanzo beans, drained

Heat the oil and brown the onions. Once they're pretty brown, throw in the garlic, the corriander, cumin, red pepper flakes (to taste), and salt and cook for a few minutes. Then, toss in the quinoa and heat it up for a few minutes. Put in the tomatoes, chickpeas, and broth. Let it boil for a minute then turn it way down and cook for 20 minutes.

This is delicious! And, you can see I've served it with my beer bread, which I am still completely enamored with.

Tuesday, January 19, 2010

Beer Bread

Oh man oh man oh man!

I'm always trying to figure out some miraculous fast way to make bread at home. I have tried things like this whole artisan bread in 5 minutes a day kick people were on, I've tried other fast and easy tricks. And, let me tell you, I have made a lot of bad bread (see Exhibit A. it was not delicious. it looked like a giant cow pattie. it did not look like the picture on the internet. neither did any of the rest of the ones I made).


Exhibit A.

BUT. This, this might be the answer. And, of course, the answer involved beer.

This is suuuuuuuuuper easy:
1 bottle beer (I used Sierra Nevada IPA because thats what I had)
3c flour
.5tsp salt
1tsp baking powder
1/3c sugar

Stir it up. Put it in a loaf pan. Let it sit for like half an hour to an hour if you have time. Put it in the oven at 350, and bake for about 1 hour. If you want, 3/4 of the way through you can spread butter on the top of it.

Check this out! Its not deformed!


And check THIS out... (DRUMROLL, PLEASE...)

Yummmmmmmmmmmmmmmmmmmmm

(ps. if you have self-rising flour, use that. just skip the salt and baking powder)

LinkWithin

Related Posts with Thumbnails