Showing posts with label lauren. Show all posts

Monday, January 21, 2013

Roasted Garbanzo Beans


Roasted garbanzo beans are one of these things that everyone else on the internet seems to have mastered and yet I can never get them right. Every six months or so I try again, and every six months or so I fail. This is the closest I have ever gotten to victory, so I'm just going to post it while I'm ahead!

Now, here is the lore of the roasted garbanzo bean: it's so cheap, just a can of beans! it's so healthy, so much protein! it's so easy, just throw them in the oven and roast! Hmm.

From my failures, I have deduced a few things.
1. you MUST taste them. if they are still soft inside, they will taste ok when they are super hot, and immediately start tasting gross when they cool
2. put oil on AFTER you roast them, otherwise it keeps the water from evaporating and they don't get dry.
3. forget what everyone says about cooking times, watch these buggers like a hawk.

Now! here is what I did:

The Stuff
--1 can beans (easy there, cowboy, you probably think you can put in a few cans at once- this relates directly to a past failure, if the beans are all bunched up, they won't dry- they need space!
--1-2 tsp olive oil
--spices of choice: here I used smoked paprika and salt. you could also do cumin/corriander or some people even do cinnamon sugar

What to do with it
Drain the beans and rinse very very well, shake them out in a strainer. Then, roll them around between 2 paper towels and try to get rid of the little skins that come off. Sprinkle with spices. Put them on a cookie sheet and toss them in the oven at 400.

This will now take about half an hour, but you have got to keep checking, and towards the end will have to sacrifice one bean per check, so you know if they're crunchy. Once they're done, toss them with the oil, and any additional spices (to taste).

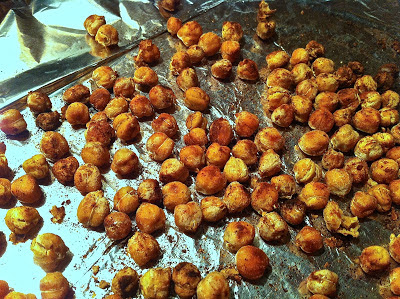
This was my first batch:
You will notice a large percentage of "very well done" beans. You don't want this. They do not taste good.

My second batch (made out of pure stubbornness) was much better.:

Now, what's the verdict? Well, I love smoked paprika and it gave it a nice barbecuey kind of flavor that was great. They were kind of crunchy, almost like corn nuts, which I also like. One thing to keep in mind is that it is very easy to eat a lot of these- the beans shrink up quite a bit so each can does not make a very big bowl (that is a cereal bowl in the picture). Because of this, it is entirely possible to eat an entire can of beans in a very short amount of time. Whether you want to eat an entire can of beans in a very short amount of time is a life choice you have to make for yourself. And if you were going to make these for a party or something, multiple cans would be required. Overall, they were pretty good, but they take so long to cook and were so finicky, now that I've actually conquered them, I'll probably never make them again (in this way they bear a similarity to the whole dulce de leche fiasco a few years back). Ah well.

Anyways, if you are really craving something crunchy, have plenty of time on your hands, and are dying to get rid of some beans, this snack is for you!


Saturday, June 23, 2012

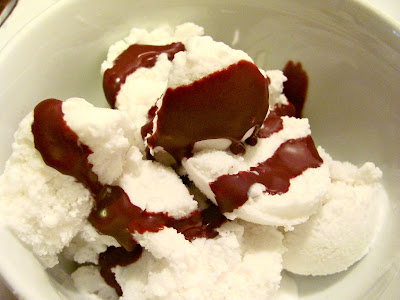
Coconut Sorbet and Homemade Magic Shell (Vegan!)

Imagine the magic of a childhood treat... cold refreshing ice cream with a crunchy shell that you have to  crash through with your spoon to take a bite. Ahhhhhh.... Magic Shell! 

Now, somehow my adult self has avoided Magic Shell just because it seemed like there was no way something like that didn't have a million scary and bizarre ingredients. Then thanks to my good friend Pinterest, I found out you can make it yourself, at home, with only 2 simple ingredients.

Honestly, I'm not sure I am prepared to wield that kind of power.


But, now that I know this amazing secret for myself, who am I to keep it from you. So, here it is.

The pin I found for the topping was from the blog AlphaMom, and it looks like there is plenty of other good stuff to be found over there. But, first, I'm going to fill you in on the sorbet itself, because it's pretty amazingly simple as well.

Sorbet- what you need:
2 cans coconut milk (I used 1 whole fat and 1 light)
1/2 c shredded coconut
1/8 c sweetener (sugar or agave)

What to do with it:
Hang onto your hats, this is pretty complicated. Dump all the above ingredients into your trusty ice cream maker. Push "go". When it seems to be pretty well frozen, scoop it out and put it in the freezer in a tupperware. That's it!

"Magic Shell"- what you need:
1 1/4 c chocolate chips (if you want this to be vegan, then do your due diligence on your chip selection)
1/2 c coconut oil

What to do with it:
This is also VERY VERY COMPLICATED. Put the chips and oil together in a bowl in the microwave, and run for 1 minute or so until it's melted. Let it sit a minute then stir until totally combined. It's pretty runny at this point, but when you pour it over the ice cream it'll freeze right up!


This whole thing is kind of genius... basically, it's all capitalizing on the fact that coconut has a really interesting melting point (around 76 degrees). So, it you warm this up just a bit, it's melted, but as soon as it cools, it solidifies. You can keep it in the fridge and then warm it up a bit so you can pour some off to serve.

Overall, the coconut sorbet itself isn't too sweet, which makes it kind of nice and refreshing- plus, it's rich enough from the coconut milk to seem decadent without needing a lot of sugar. And seriously, there is something about whacking the chocolate sauce with the spoon that's just fun, that's all there is too it.


Saturday, June 9, 2012

We made cheese.... yes! CHEESE!!!

To me, cheese is a kind of magical substance that appears at the store and seems way beyond the capacity of any normal, modern, non farming, person to make unsupervised.

Oh, I was wrong! Not only can you make it, you can make it in 30 minutes!

It turns out, to make delicious mozzarella cheese, this is all you need:
- A gallon of whole milk
- citric acid
- rennet (I got liquid vegetarian rennet, because real rennet kind of grosses me out)
- salt

I got all of this at whole foods for a reasonable price (although I had to ask for help finding stuff), and I have enough rennet and citric acid for many many more batches.

So- what do you do? Turns out most of it is pretty simple.

Combine 1.5 tsp citric acid with 1/4c water. Also combine (separately) 1/4tsp rennet with 1/4c water. Pour the milk in a large pot and slowly (this will require only low heat) bring it up to 55 degrees - as a warning, this is really not very hot at all so be sure you're taking the temperature as soon as you start heating. Once it hits 55 (Fahrenheit), pour in the citric acid and keep heating. When it hits 85, put in the rennet. Continue to heat, but stir very very gently and only occasionally- you want the curds to be able to form. 

Keep heating (to around 95-105) and pretty soon, the milk will start to seem clumpy and thick, and separate from the side of the pan.
When this happens, stop heating it, and just let the curds sit there for about 5 minutes or so, so they can separate from the whey in peace.

Now, this next part was actually the hardest for me- you want to get the curds out and leave behind the whey. You can gently scoop it into another bowl using a slotted spoon, but depending on how big the slots are it can get a little tough towards the end.

Now, here is where we start to use modern technology to make this stuff happen fast (a trick I learned from SimpleBites). Take the bowl with the curds and stick it in the microwave for 60 seconds. Lots of whey will come out, so drain it off carefully. (I have no pictures of this part because I was busy trying to do things like drain off whey without dumping all the cheese on the floor). Fold it over to distribute the heat, then put it back in the microwave. Sprinkle with half a tsp of salt. Repeat this microwaving (not the adding of salt) until it starts to look like melted mozzarella (I had to do it more times than the original website did- don't despair, just keep going!). 

You should get to a point where you can stretch it a long way without breaking, when that happens, you're ready to make it into little balls! (or a big log, or whatever). Just roll it in your hands while it's still hot and melty.

Then of course you have the important dilemma of what to do with all this awesomeness.

We decided to make turkey slider patties (a current addiction) and grill a lot of veggies. We did peppers, onions, carrots, and zucchini, while they were hot they were tossed with garlic, olive oil, balsamic vinegar, and dry basil (fresh would have been awesome). 

 Then we cut the balls into little pieces (they were a little big) and tossed those in, and served it on a bed of baby spinach. So delicious!!

It would also be amazing on homemade pizza (like our bbq version!) or about a million other things... give it a shot!

Sunday, June 3, 2012

Fancy-schmancy Springtime Eggs- aka Brunch in 5 Minutes

Ok, in terms of cuteness vs. easiness, these eggs pretty much have all the odds in their favor. I saw them (of course) on Pinterest, and they originally came from Apron Strings. If you can get a 4 lobed pepper, they're not just cute, they look like little flowers! (and they'd be a lot cuter if I liked my eggs less cooked like the rest of the world seems to)

Anyhow... basically, here is your giant ingredient list, hold onto your hats!
Eggs
Bell peppers.

All you do here is slice the pepper into about 1/2 inch thick rings (through the widest part of the pepper). Heat up the pan on medium heat, spray with cooking spray or put in a little olive oil, put in the pepper, and crack the egg right into the pepper. A little egg will leak out, but it's easy to remove later.
You can flip them but you have to wait until the egg has cooked enough to stay together when you flip it. If you like runny eggs (which I don't) you could actually cook it on low until the egg seems solid and then serve as is! Use salt/pepper/chili sauce and whatever you normally would put on a fried egg.

Basically, it's not necessarily out of the ordinary in terms of taste, because it's still just a plain egg and bell pepper, but it definitely is an easy way to make eggs a little more special!

Friday, December 30, 2011

Save Yourself from Yourself Post-Holiday Kale Salad

If you're like me, the last few weeks have been chock-full of deliciously terrible things, like fudge and toffee and cookies of every shape and size. Oh, it was glorious. However, by the end, I felt something like this:

So, I made this salad immediately upon arriving home from my holiday family visit, and have made 2 more batches this week already. I actually ate it so many times I googled what happens if you eat too much kale. (answer: people say you CAN eat too much raw kale and it'll give you hypothyroidism. I didn't verify that information anywhere legit, though so don't take my word for it). So, moderation in all things, even raw kale, apparently.

At any rate, this was super easy, extremely delicious, kept well until the next day, and is good for you. What else can you ask for?

The stuff:
-1 bunch curly kale
-1 lemon
-olive oil
-salt
-pepper
-craisins
-walnuts
-parmesan (optional)

What to do with it:
Take the kale and cut out the really thick bottom portion of the stems. Stack the leaves on top of each other, and cut it into thin ribbons (you might need to cut it once lengthwise down the middle if they are too long)*. Put them in a bowl and squeeze all of the juice from the lemon onto the kale. Use your (clean) hand to squeeze or massage the kale for a few minutes- it makes it just a bit softer and also gets the lemon well mixed in. If you can, let it sit there for a bit, if you can't just proceed onwards. Pour about a tablespoon of olive oil over the leaves, add salt and pepper to taste, and toss with a fork. The, coarsely chop the craisins and walnuts and throw those in- these are the main source of calories so you can judge for yourself how much you want. I put in a lot of nuts because the dinner I was having was light and I wanted protein. If you'd like, you can grate in some good quality hard cheese (I used parmesan the first time and skipped it the other times). It does add a little something, but it is optional.

I ate mine with just a roasted sweet potato and it was delicious. The salad comes together extremely quickly, and if you microwave the sweet potato (roasted is better but microwaved actually is fine) you can have a very healthy dinner ready to eat in about 10 minutes. This may become a weeknight staple!


*note: for Christmas I got a very nice (VERY SHARP) chefs knife. I was really excited to use it, until about 30 seconds into my salad making experience I sustained an injury in the line of duty. Not to be thwarted, after taking important steps (like using half a box of bandaids and calling my Mom to tell her I got hurt) I took this picture with my left hand raised in the air above my head. I think it came out pretty well, all things considering. Lesson learned, when they say to curl your hands under while chopping, they're not kidding!

Thursday, December 22, 2011

Coconut Carrot Curry Soup

This is a really nice soup that you can throw together pretty quickly, but that is really warm and delicous and tastes way more complicated than it really is.

1 can coconut milk (usually I use light, but this was regular and oh, it was so decadent tasting)
5-6c water
2 big leeks
10-12 carrots, chopped
1 tbsp oil
1 inch plug of fresh ginger, chopped
2-3 tsp red curry paste (or to taste)
pinch of salt

Chop everything up, you'll ultimately blend it so don't get too bent out of shape about how they look, but they should be approximately the same size so they cook at the same rate.


Heat the oil in a large pot, toss in the leeks and ginger, and let it brown just a little. Then throw in the carrots. Cook for about 5 minutes. Then pour in the liquid. In general the amounts (like, of carrots/leeks/etc) don't matter so much, it isn't an exact recipe, but you want the liquid to cover the top of the veggies.

Add the salt and curry paste (I use the Thai Kitchen version, which they have in the ethnic section of my regular grocery store). If you like it spicier, add 3-4 tsp, less spicy, add 1. The only thing is, you don't want to overpower the taste of the carrots and end up with what basically just tastes like curry sauce, so I'd taste along the way.

Let it simmer for about 20 minutes, until everything is very soft. Then, blend with an immersion blender or else put it in a big blender. Continue to simmer a bit once blended so the flavors can really combine, then enjoy!

Given that it's basically just veggies and coconut milk it is amazing how rich this tasted, and the color is just amazing and bright. The only work is really the chopping, and then you just let it go- the whole thing takes about half an hour, of which 20 minutes is simmering. Definitely feasible for a nice winter week night dinner!


Friday, November 18, 2011

Thanksgiving: The Soup Course

Historically, I have been a little delinquent about getting things out in time for the actual holidays (you know, before the holidays actually occur and it's way too late for anything to be of any use). But, this year things are going to change... I'm going to post a series of recipes, old and new, that might be appropriate for inclusion in your Thanksgiving feast! These first two suggestions are two oldies but goodies.

Butternut Squash Soup
This is pretty delicious, not particularly difficult, and very seasonal.
http://yellowfishblog.blogspot.com/2008/02/comfort-food-squash-soup.html


10 Minute Pumpkin Soup
This is the fastest easiest soup ever. It's also light, so if you have a small cup of it, your stuffing eating potential will not be hampered in any way.
http://yellowfishblog.blogspot.com/2010/12/ten-minute-pumpkin-soup.html


As a side note, both of these soups are vegan, so if you have some vegetarian/vegan folks and are worried about having things that they'll be able to eat, these are definitely something that everyone can enjoy.

Sunday, October 9, 2011

Spicy Egyptian Couscous


This is a delicious, quick easy veggie recipe that makes a nice light but comforting dinner. I found it here, but these are my adaptations.

1 cup couscous (and 2 c water for cooking or else 1c water/ 1c broth)
1/2 an onion, chopped
1 tbsp. olive oil
1 zucchini, cut in 1/2-inch pieces
1 cup carrots, grated
1/2 tsp. coriander
pinch cayenne pepper (more if you like spice)
2 cloves garlic, crushed (or 2 tsp chopped garlic from the jar)
3/4 tsp. cumin
1 can garbanzo beans, drained
4 tsp. water

Cook the couscous by itself (just bring the 2c water to a boil, pour in the dry couscous, cover, and let it sit while you do the rest).

Heat up the oil and add the coriander, cayenne, garlic, cumin- stir for a minute, then add the onion, zucchini, and cook until soft. Then, pour in the beans and 4 tsp water. Combine with cooked couscous, stir, let sit a bit to mix, then eat! It also reheats really well in the microwave for lunch.

The flavors in this are nice- the carrots give it a sweetness, and if you put enough cayenne to get some heat, it makes a nice combination. The zucchini and extra water also make it very moist. Give it a shot!

Wednesday, July 6, 2011

Beet Bonanza

In a recent CSA box, I got a really nice bunch of beets, greens and all. Now, I come from a Scandinavian, beet eating family, but I myself have never been a beet lover. I've never really been sure if that was because I'm just not into pickled beets, or canned beets (I never remember seeing an actual raw beet). So, I figured that this was the time to find out.

My plan was to use both the beets themselves and the beet greens in separate dishes. I found a good looking basic recipe to start from, got a few additional ideas, and went from there.


The beets themselves:
-beets, peeled and sliced (I had 4 beets total)
-olive oil
-fresh chopped rosemary
-salt/pepper
-crumbled feta

Preheat the oven to 350. Toss the beet slices (being careful not to turn yourself and everything around you purple) in the olive oil and chopped rosemary, sprinkle with salt and pepper. Roast in the oven until a knife goes easily through, and the edges are nicely caramelized, about 25 minutes. Before serving, sprinkle with feta.

The greens:
-olive oil (1 tbsp)
-chopped beet greens from your beets
-1/4 chopped small onion
-2 cloves garlic, chopped
-small amount balsamic vinegar

When the beets are nearly done, heat the olive oil in a pan, brown the onion and garlic, and then put in the greens, stirring until wilted. Turn off the heat, and sprinkle with a few drops of balsamic vinegar.

The chicken:
The chicken isn't really the focus of this post, but in case you're curious, I put 2 thawed chicken breasts into a ziplock bag with some chopped rosemary, 2 tbsp olive oil, 2 tbsp balsamic vinegar, salt, and pepper, and marinated for about 2 hours. Then, I put it on the grill while the beets were roasting.

I have mixed reviews on this- the recipes themselves were good- I liked the greens a lot, and the rosemary and feta really complimented the sweetness of the beets. Unfortunately, I still think I don't like beets- they're just too sweet for me. But, if you do like them, I think this is a unique take and a nice flavor combination.

Monday, June 20, 2011

Garbanzo Beans and Kale Bake

Now, we enter the phase in which I start to tell you the thrilling tale of how I used up CSA Box #1. I'm just warning you, there were a whole lotta greens in there, so get yourself ready.

This recipe was really good, and suuuuuuuuper easy. You really can't go wrong when there are so few ingredients!


The stuff:
1 onion, quartered and sliced
1 can garbanzo beans (or, white beans) drained and rinsed
4 cloves garlic
a big bunch of kale, rinsed, big stems removed, and chopped
Parmesan cheese- better quality is better, but all I had was the finely grated kind.
(also olive oil, salt, pepper)

What to do with it:
Take a 9x13 pan, dump the beans, onions, and garlic inside. Sprinkle salt and pepper according to taste (although, watch it with the salt, this starts tasting salty fast), and toss with about a tablespoon of olive oil. It might sound like a lot, but all the other ingredients are low calorie, and using olive oil as opposed to something like cooking spray makes a big difference with such a simple dish. Bake the mixture at 400, stirring occasionally, until the beans and onions are lightly browned. With the garlic and onions, it should smell delicious.

Once the beans are brown, put the kale in the pan, and stir it around. It'll shrink a bit, so don't worry if it looks like a lot. Be sure it is mixes well so the onions, beans, garlic, and oil get their flavor on the kale.  Once it's mixed liberally sprinkle the top with Parmesan cheese (if you want it to be vegan, it'd probably taste fine without it). Continue to bake at 400 until the kale is getting a little bit brown, and it seems softened.
This could make a great side dish, although I ate it as a light dinner just as is! It heated up really well for lunch the next day, too. This is definitely going to be a go-to way to cook greens in the future- it comes together quickly, and the ingredients are things that a well-stocked pantry should have on hand. Give it a try!

Thursday, June 16, 2011

Scones: Not for the Faint of Heart

Here is another recipe that got buried in the depths of my iPhoto. THIS one dates way back to when I decided that the most appropriate food for watching the Royal Wedding was clearly English Scones (I'll note, I watched the wedding on DVR the next night, not having the stamina to stay up until 3am on the actual day) . I found a recipe on the internet (over at Delicious Days), and promptly realized I didn't have half the ingredients. Not one to let that stand in the way, I persevered.

Unfortunately, perseverance does not always pay off. At the Royal Wedding, Kate Middleton looked fresh, sophisticated, and absolutely beautiful.

At the time I watched the Royal Wedding, my scones looked and tasted like deformed, flat, burnt, rock hard cow patties (with a lovely decorative sliced almond topping).

I decided that kind of turn of events was best coped with by drinking a large glass of wine and settling in for hours of dress ogling, which I'm still pretty sure was the right decision. But I woke up in the morning bound to set things right. And oh, I did. This was batch number two. So good!

First I'll give you the good recipe, then let you know where I went astray.

What you need:

200g WHITE all-purpose flour, plus more for when you deal with the dough
1.5 tsp baking powder
2.5 tbsp white sugar
.5 tsp  salt
60g cold butter (yes, butter)
140-150g milk (I used almond milk)
some kind of fruit- raisins, cranberries, (I used dried cherries).

You'll notice that these measurements are in grams, which isn't normal for me, but that's how the recipe I found was, and part of going astray was not just sticking with it. So, I used my trusty food scale and did things right.

What to do with it:
Preheat your oven to 425, and line a cookie sheet with parchment paper. I used my food processor for this, but if you go back to the original site, there are directions for doing it by hand.

Put in the flour, the baking powder, the sugar and the salt and pulse briefly until well mixed. Make sure your butter is really cold, and cut it in to small pieces. Pulse that in with the dry ingredients until it forms a crumbly mixture with no large chunks of butter. Toss in whatever fruit you decide to use, pulse some more until it's chopped up and mixed. Distribute the chopped dried fruits and pulse once or twice, then add the milk of your choice and pulse again. Do this just until the dough comes together and the flour is incorporated- don't over mix. It can be a little wet, but you can always add a little more flour.

Dump out the dough onto  a well floured board. Sprinkle with more flour and knead it with your hands a bit, just enough for it to come together into a real dough. Now, smush/lightly roll the entire thing out so it is about 1.5 inches thick. You need something round to cut them- I just used a juice glass, but probably a cookie cutter is what's called for. Put each piece on the tray. Bake 13-15 minutes until golden brown.

Mine were delicious with butter and jam, but do with them whatever you like! They kept well in a ziplock baggie for about a week.

NOW... where did this all go so sadly wrong. My mistakes were:
1. wax paper can NOT (not not not!) be swapped out for parchment paper. Don't even try it. If I wasn't desperate for scones and already in my pajamas, I wouldn't have done it either.
2. apparently in this recipe, wheat flour is not a good thing. it just made it too dense- the difference in how well they rose in the wheat and white versions was remarkable. If you have some major baking mojo and know other ways to adapt this recipe around the wheat flour (I did add a bit more milk), it might work.
3. apparently, also in this recipe, Earth Balance (my butter substitute of choice) is vastly inferior to good old butter. (Julia Child would be proud)
4. I didn't trust the dough, and added too much flour. Then, I decided not do bother with using a cookie cutter or anything, and just cut them into triangles, which involved a little sawing, which apparently interferes with even rising.

What is the take home message? Basically, when baking, you have less leeway. Also, when something like Royal Wedding treats are on the line, just follow the recipe! Best of luck to you, may you learn from my mistakes!

Wednesday, March 2, 2011

Peanut Soup.... Try It. Seriously.

I am always on the lookout for delicious soups. I also have a longtime obsession with Thai Peanut Sauce, which I could probably eat way to often if you let me. Actually, if you expand it to just peanut butter, I could probably eat it daily for an indefinite amount of time. That stuff is delicious (for the record, I am firmly in the camp of old fashioned, peanuts only, crunchy peanut butter. none of that processed junk that doesn't even need go to in the fridge, which is just scary).

ANYWAYS... with my peanut-love, I was very delighted to see this Thai Peanut Soup recipe, which I made pretty much just as described.


The Stuff:
1/3 cup finely chopped onion
1/3 cup finely chopped celery
1/4 cup finely chopped red bell pepper
1 tablespoon margarine/butter/oil of your choice
3 tablespoons flour
1 tablespoon very finely chopped lemongrass (white part only) or 1 tsp finely shredded lemon peel*
1/4 teaspoon ground red pepper (more if you like it spicy)
1 (14-oz) can chicken broth (about 1 3/4 cups) or veggie broth
1 (13 1/2-oz) can unsweetened light coconut milk (about 1 1/2 cups)
1/2 cup peanut butter (obviously I used crunchy)
1 tablespoon soy sauce

optional garnish:
1/4 cup chopped peanut
diced fresh cilantro 
thinly sliced red pepper
sesame oil 

What to do with it:
In a medium saucepan cook onion, celery, and finely chopped red sweet pepper in oil until tender. Stir in flour, lemongrass, and ground red pepper. Add chicken broth and coconut milk together. Cook, stirring, until mixture is slightly thickened and bubbly. Then just cook a few minutes more so it's really thick. When that's done, add the peanut butter and soy sauce at the very end. Then, garnish as you wish.


This was really really good... it was hearty and warm and flavorful and absolutely delicious. The original post says you can add chicken, which I'm sure you can  (obviously de-vegetarianizing it along the way), but honestly I don't think it needs it. It is very filling as it is. Try it, you'll like it!


* a quick note about lemon grass... it's one of those ingredients that always foils me- I never have it at the right time, and if I do buy some, I never use it all up. NO MORE! I posted previously about my giant excitement with the frozen herbs, well, someone got in touch with the good people over at Gourmet Garden, who make lemongrass in a tube! They had it in the produce section of my grocery store... this is genius, I tell you, genius!

Tuesday, September 14, 2010

Roasted Cauliflower, Bulgar and Toasted Walnuts with Pumpkin Sauce

This recipe is perfect for a crisp fall evening- its light, but it is also very satisfying. It was borne out of the list of things that existed in my kitchen, but turned out surprisingly well. It's close to being vegan, but doesn't quite make it although I'm sure where there's a will, there's a way.
What you need:
1c bulgur wheat
half a head of cauliflower
1 cup mashed pumpkin (NOT pumpkin pie mix!!!)
1/2 large onion, diced
3/4 c broth (chicken or veggie)
3/4 c milk (I used plain almond milk)
1/4c parmesan cheese
2 tsp ground sage (or, fresh if you have it)
3 cloves garlic
1/4c fat free greek yogurt
walnuts
olive oil

What to do with it:
Cauliflower- cut into florets, toss in a little olive oil, roast in 400 degree oven, stirring a few times, until nice and brown

Bulgur - this is very easy to cook. You can actually just boil water, pour 1 c bulgur into a bowl, pour 2.25c water on it, cover,  and let it sit while you do everything else. Stir once while it sits.

Walnuts- for me, toasted walnuts are like crack. Seriously, I don't even like plain walnuts but when you toast them they turn into something amazing and decadent, and they added a really critically delicious crunch that you don't want to miss. So, toast the walnuts. I did this under the broiler, which resulted in an initial batch of blackened burnt nuts. The second ones... delicious!

Pumpkin sauce- this is based on a very delicious recipe that I found out in the Washington Post.  Saute the onions and garlic in a bit of the olive oil until soft and brown. Add sage and cook a few more minutes. Add the broth, the pumpkin, and the milk, and cook for about 10 minutes, letting it thicken a bit. When your cauliflower, walnuts and bulgur are ready, remove the sauce from the heat, and stir in the cheese. Then, at the last minute stir in the yogurt (the sauce shouldn't be boiling when you do this). You could do this without the cheese and yogurt to make it vegan, but I can't make any promises about the cheesy goodness in that scenario.

Assembly... basically, serve some bulgur, top with cauliflower, add sauce, and then the walnuts! I had my doubts about whether the sauce would be overly pumpkin-y, but it actually was amazing, and I plan to make it again. It would also be delicious on pasta. Enjoy!


(FYI, this post refers to a dinner prior to receiving my glorious CSA box, so despite all my hype about using that for the next 2 weeks, none of this was in there).

Tuesday, July 13, 2010

Sage Apple Cornbread

So, in addition to lemon cucumbers, my co-gardener across the city has a bumper crop of sage. There is sage drying for burning, and I managed to abscond with some so I could cook something with it.

Most of the things I'm familiar with using sage for are things like my Gnocchi, Sage, and Butternut Squash, which is very wintery and not what you want to make out of your nice summer garden. After a bit of looking around, this is what I landed on:

Apple Sage Cornbread (based on the cornbread recipe on the corn meal box!)
1c cornmeal
1c flour
.25c sugar
1tbsp baking powder
1tsp salt
1c milk (almond milk, around here)
1/3c oil
1 egg

Mix all those ingredients together, as your base mixture, then lightly sauté the following:
half an onion, finely chopped (do this first, it has to cook the most)
about 10 chopped sage leaves
1 cob of corn, kernels cut off
1 apple, chopped finely

Add these to the mixture, bake at 400 for about 20-25 min (8x8 pan).

Simple Sage Bean Salad
This is a nice, simple cold dish that paired well with the cornbread.

1 can white beans, rinsed and drained
half an onion, finely chopped
sage leaves, chopped
fresh chives, chopped
1 roma tomato, chopped (more if you like tomatoes more than I do!)
half a red pepper, chopped
about 2oz gorgonzola

top with oil, balsamic vinegar, salt, pepper. Let sit in the fridge for a while to chill and let the flavors blend.

All in all, this meal was a nice use of some fresh ingredients, and made for a good summer dinner!


Thursday, April 29, 2010

Breakfast Quinoa

I've been looking for some new breakfast ideas (although I'm not really over the whole smoothie thing quite yet, it seems good to diversify). So, over at Cara's Cravings I found this recipe for breakfast quinoa, which I had never really considered... its appealing because quinoa is so good for you, and I thought it might fill an oatmeal type role but with more protein.

She recommends using Almond milk, which I've been curious about but never tasted, so, I went for it! I cooked 1 cup quinoa in 2 cups water, with a splash of Almond milk and a sprinkle of cinnamon. Then, I let it cool a bit and stuck it in the fridge, and poured a bit more Almond milk to soak in overnight. In the morning, I put some in a bowl, topped with some cinnamon, a few frozen blueberries, and a drizzle of honey, and microwaved it.

It was pretty good! I think tomorrow I might put in some nuts or something to add a little different texture, and I also got some awesome plums at the farmers market and I'm planning to cut one up and throw it in there. I think I also just have to get used to the taste of quinoa as a breakfast thing. But, its worth continuing on (and, I have a lot left over so will be eating this for a few days, so there are more chances to try!). Give it a shot...

_____
****UPDATE!*****
I did get to try this with the awesome farmers market fruit, and it was much better (or maybe I just liked the fruit?). I also added additional almond milk. Anyways, check out how beautiful it was, here!

Tuesday, February 9, 2010

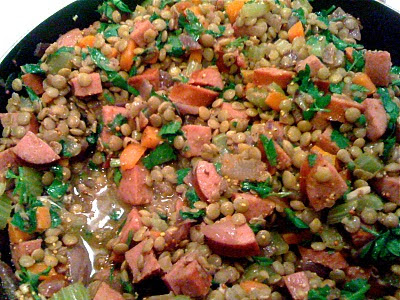
French Lentil Salad

Well, its been a few weeks since my last lentil post, and given that they're pretty much a staple around here the next was was bound to show up soon! This, though, is totally different. I'm kind of bored with my usual rotation of Indian-ish or Mexican-ish spices, so it was the perfect way to shake things up. It is also one of those things where you take the first bite and stop a second and go, wait, did I really make that?


This is hacked together as a combo of this recipe from epicurious and this one from userealbutter, and my own little tweaks.

lentils:
1.5 cups lentils (I used regular green lentils. Red lentils are not recommended)
5 cups water
2 bay leaves

non-lentil warm stuff:
1/2-3/4c chopped carrot
1/2-3/4c chopped celery
one medium onion, chopped
1 Jenny-Oh low fat turkey kielbasa, cut in small pieces

dressing:
1/4c olive oil
1/3c balsamic
1/3c white wine vinegar
(basically a lot of vinegar of your choice- could be all red wine. don't use all balsamic, it'll over power)
2 tablespoons mustard (I used grainy dijon)
2 tsp black pepper
1 tsp salt
1.5-2tsp dry thyme
1 chopped garlic clove

a very big bunch of parsley (don't leave this out)

what to do with it:
-Boil lentils with bay leaves until done, but not mushy. Drain extra water.
-In the meantime, cook the veggies and sausage in a little bit of olive oil until browned and soft (carrots and celery can be a little crunchy)
-While that cooks, mix up vinaigrette ingredients.
-Mix it all together!
-Chop parsley, and stir in at the end, after you are done heating (this does not have to be served super hot, it can just be warm).

This was delicious as is, I mean, really delicious. It also went really quickly for a weeknight, because you can basically cook everything during the time the lentils cook, which is about 20 minutes. I'm not usually a sausage person, but it really worked here, and if you get the lowfat turkey kind, its pretty low guilt. I think you could also sub in smoked tofu if you wanted to veggie-fy it.

The next day I wanted it a little more veggie heavy, so heated up a portion of the lentil mixture, and added 2 large handfuls of rinsed chopped raw spinach. This was much more salad like and would make a really perfect lunch.

Tuesday, January 19, 2010

Beer Bread

Oh man oh man oh man!

I'm always trying to figure out some miraculous fast way to make bread at home. I have tried things like this whole artisan bread in 5 minutes a day kick people were on, I've tried other fast and easy tricks. And, let me tell you, I have made a lot of bad bread (see Exhibit A. it was not delicious. it looked like a giant cow pattie. it did not look like the picture on the internet. neither did any of the rest of the ones I made).


Exhibit A.

BUT. This, this might be the answer. And, of course, the answer involved beer.

This is suuuuuuuuuper easy:
1 bottle beer (I used Sierra Nevada IPA because thats what I had)
3c flour
.5tsp salt
1tsp baking powder
1/3c sugar

Stir it up. Put it in a loaf pan. Let it sit for like half an hour to an hour if you have time. Put it in the oven at 350, and bake for about 1 hour. If you want, 3/4 of the way through you can spread butter on the top of it.

Check this out! Its not deformed!


And check THIS out... (DRUMROLL, PLEASE...)

Yummmmmmmmmmmmmmmmmmmmm

(ps. if you have self-rising flour, use that. just skip the salt and baking powder)

Tuesday, December 1, 2009

Super Easy Walnut Brussel Sprouts

I may have previously mentioned that, against all odds, as an adult I have been converted to an unabashed, full-fledged, Brussel sprout eater.

Here is a super easy, fast, simple, delicious version ...

You need:
-olive oil or butter
-a big pile of brussel sprouts
-chopped walnuts
-salt and pepper

Slice up the sprouts so their kind of leafy (see picture). Heat up some oil/butter, and toss in the walnuts so they get a little toasty. Throw in the chopped sprouts, and saute... you want to make them get a teeny bit brown, but not soggy (overcooking them is a top cause of nasty sprouts). Sprinkle with salt and pepper and serve! yum!

Sunday, August 30, 2009

Summer in a Bowl! (White Soup)

As a precursor to the "summer in a crust" peach blueberry crostata, we had a very delicious meal that included one of my long time childhood favorites: "white soup" (aka Cucumber soup or white gazpacho). My Mom used to make this when it was really hot out, and we'd sit out and eat it for dinner at the patio table and it all seemed like a giant treat. While I was on vacation, she made it again, and I remembered all over again how awesome it is. So, here is her recipe...

Basically, this is what you need:
1 cucumber- peeled, seeded, chopped
1c sour cream (or, non fat plain yogurt. or, some combo of the two)
1c chicken broth (I would guess veggie broth would work)
1T white vinegar
1/3 clove garlic
salt to taste

Just take it all, throw it in the blender, blend it up, and chill for at least 6 hours (or over night).

Then when you serve it, the fun starts- toppings can be slivered almonds, diced tomatoes, green onions, bacon bits, bell pepper pieces... the sky is the limit! The soup itself has a very cool cucumbery flavor that would probably be amenable to a lot of different type of toppings.

And, here is the glamor shot:

(and, for those budget cookers out there, this would be a good example of how you can make something that looks and tastes really fancy, that you could serve to anyone, out of just a few very budget-friendly ingredients)

Saturday, June 6, 2009

Foccacia!

I've previously posted on my ongoing efforts to make various kinds of flatbreads. Part of the reason for my obsession is that it kind of blows my mind that when it gets down to it, a lot of these are just made of different permutations of flour and water. Do it one way, get paste! Do it another way, get bread! Its crazy! At any rate, this project has been met with various successes and failures, including

Cumin-sesame flatbread, verdict: ok.
Poppy seed roti, verdict: totally not worth the effort
Pita, verdict: the best, most entertaining, awesome thing I've ever made
and now...
Foccacia. (verdict: good!)

1 tsp sugar
1 (.25 ounce) package active dry yeast
1/3 cup warm water
2 cups flour
2 tbsp olive oil
1/4 tsp salt

First, proof the yeast (I think the rumor is you probably don't need to do this for the little packets of yeast these days, but hey, its fun). Basically, put sugar, yeast, and warm water in a bowl. Let it sit there until its a little frothy (10 min or so), then you know the yeast is good.

Mix in the flour to the yeast mixture really well. Keep putting in water, a tablespoon at a time, until its like a dough and makes a ball that is moist but not sticky or wet.

Take it out of the bowl and make it into a ball, clean the bowl, and put a little oil in it. Put the ball in the bowl and cover with a towel. Put it in a warm place (if you're me, preheat the oven and let it sit on top) and let it sit for about 30 min.

Knead for a minute to deflate, and then put it on a lightly greased cookie sheet. Press it out, so it becomes pretty big and flat- mine took up almost the whole cookie sheet. Then brush with oil, sprinkle the top with salt and whatever herbs you feel like (basil, rosemary).

Bake it in a preheated HOT (475 degrees) oven for 10-20 minutes depending on how thick you made it and how crunchy you want it.

See how awesome it looks?


And here it is in context...

LinkWithin

Related Posts with Thumbnails