Showing posts with label Dessert. Show all posts

Wednesday, June 4, 2014

Rainbow Krispie Treats

This is a post that is WAY overdue. I made these on a freezing snowy day when I didn't want to go all the way to the grocery store, but I also had a giant rice krispie treat craving. I went to the bodega on the corner to see what kind of fixings they had, and this is the result:

Now, I know what you're thinking. You're thinking "holy smokes, that must be insanely sweet". And I'm here to tell you, YOU DON'T EVEN KNOW THE HALF OF IT.

So, clearly what we have here are not regular krispies but Fruity Pebbles. That's one thing. BUT, they also did not have plain marshmallows, they had these (not my picture):

Yes, these are strawberry and vanilla marshmallows, just to add that extra little something. I'm normally a Jet-Puffed marshmallow loyalist (Jet-Puffed marshmallow creme being a core ingredient of the family Christmas fudge recipe). And, I had a moment of fear that I would end up like Liz Lemon, who became addicted to off-brand cheez puffs called "Sabor de Soledad" from her corner store. 

Fortunately, no such thing happened, the only result was some very festive looking treats.

I followed the normal recipe- the bag of marshmallows, a few tablespoons of butter all melted together, and then 6 cups of cereal. I have two tricks for smushing this stuff into the pan. 1. get your hands wet, and use your hands. 2. get waxed paper as a barrier and push down on top of it until everything is flat. The waxed paper is much better (and more sanitary), provided you actually have waxed paper. Parchment doesn't really work.

These were insanely sweet. There was not one single natural ingredient in the entire thing. And they totally hit the spot on a snow day staying home from work.


Friday, December 20, 2013

Christmas Treats, the Grand Finale: Kransekake!


If you're heading into this pre-holiday weekend looking for a cooking project, this, my friend, is it! My family has these at weddings and major birthdays, and every once in a blue moon someone feels motivated enough to make one for Christmas. It is definitely beautiful and festive, and delicious.

http://yellowfishblog.blogspot.com/2012/01/crowning-achievement-kransekake.html

Thursday, December 19, 2013

Christmas Treats: Peppermint Shortbread Cookies!


In the final item of the trifecta of peppermint based holiday recipes this week, I give you peppermint shortbread cookies, which are a really nice twist on a classic cookie. They're also something you can keep in the freezer, cut off a few rounds of, and have fresh cookies whenever someone shows up. Easy peasy!

http://yellowfishblog.blogspot.com/2011/12/peppermint-shortbread-cookies-put-these.html

Wednesday, December 18, 2013

Christmas Treats: Brittle Mania!


This time of year, it's nice to give people a little something. Ideally, this little something tastes awesome, but doesn't take up too much valuable shopping and Elf-viewing time. Even though brittle does involve a candy thermometer (and don't believe anyone who tells you it doesn't, they are either experts or they make bad brittle), it goes together quickly and tastes delicious. These non-traditional versions are extra exciting!

http://yellowfishblog.blogspot.com/2011/01/not-your-grandmas-brittle-belated.html

Tuesday, December 17, 2013

Christmas Treats: Peppermint Krispies!


If you need an easy, kid friendly treat that is not yet another thing made of gingerbread, this is your dessert! About 5 minutes more work than regular rice krispies, but so much more festive!

http://yellowfishblog.blogspot.com/2009/12/peppermint-krispies-oh-my-goodness.html

Monday, December 16, 2013

Christmas Treats: Mexican Wedding Cookies


Is this the best picture? No. Are these the best cookies? YES! I love these nutty, buttery little powdered sugar bombs and so will you!

http://yellowfishblog.blogspot.com/2008/12/forsaken-by-commercialized-christmas.html

Sunday, December 15, 2013

Monday, November 18, 2013

Thanksgiving is Coming, and you need this Pumpkin Ginger Crumble Pie!

So, we all know how it goes when jobs are getting doled out for Thanksgiving-- the real experts get the  turkey, the person with the old family recipe that is the most full of marshmallows gets the sweet potatoes, the total rookie gets the green vegetable, the person who can't cook at all goes and buys some rolls, and somewhere in the middle is the pumpkin pie. You have to be able to bake reasonably well, but let's get real, there is a perfectly good recipe on the side of the pumpkin can, so it's not all that hard.

BUT. I am going to help all of you middle of the pack pumpkin pie makers, and show you how to make a seriously awesome pie that will blow them out of the water.

I give you.... Pumpkin Ginger Crumble Pie (originally posted in 2009, man alive, this thing is practically vintage.)

(see it lurking tantalizingly in the foreground?)

Thursday, December 20, 2012

Batten Down Your Kitchens: Chocolate & Peppermint Dipped Marshmallows

This is one of those recipes where I'm not sure what possessed me to make it, but it was probably a one time whim. That said, the end result was pretty tasty so if you are struck by the same whim, I can tell you how to proceed. Be warned though, your kitchen may require a substantial recovery period.

First, come the marshmallows. Yes, you are going to MAKE MARSHMALLOWS (thanks, Alton Brown).

This is what you need
3 packages plain unflavored gelatin
1c very cold water
12oz sugar- this is about 1.5c, but I did weigh it out
1c light corn syrup
1/4tsp salt
1tsp vanilla
1/4c powdered sugar
1/4c cornstarch
cooking spray

This  is what to do with it
Get a pretty big bowl, which you're going to use to mix this all up. If you have a stand mixer, more power to you, this is going to be a lot easier- I did it with a hand mixer. Put the gelatin in the bowl along with 1/2c of the cold water.

You should also take a minute to prep the pan you'll use- I used a jelly roll pan, but they turned out kind of flat, you can also use a 9x13. Combine the powdered sugar and cornstarch. Then, spray the pan, and coat the pan with the mixture.

Now, in a sauce pan put the rest of the water, the corn syrup, the regular (granulated) sugar, and the salt. You are going to need a candy thermometer. SLOWLY bring it up to 240 and then immediately remove from heat. I have learned from years of fudge making experience that slow is key for a smooth final product.

Next you will slowly pour the corn syrup mixture into the gelatin, and start to mix. I recommend setting up some kind of music listening or movie watching situation for yourself because this is going to take a while.

You are going to keep whipping it until it gets thick. This will take something in the neighborhood of 15 solid minutes of whipping. If you have a hand mixer lets just hope you do weight training.
Eventually it will get very stiff- when this is happening, throw in the vanilla and keep going for a few more minutes. It is actually kind of amazing how it transforms, but at this point your arm will be tired and you'll just be glad something happened. Pour it into your prepped pan and spread around evenly.

As you can see from the pictures, it was already dark when I did this, so I let mine sit overnight- you can also let it sit for 3-4 hours. You will be dying to know if it worked- just resist too much poking and prodding because you'll make your mallows look gross.

When its cold, you'll see that it has formed some kind of strange flexible marshmallow sheet.

Get a surface ready that is substantially larger than your pan- coat it with the rest of the cornstarch/sugar mixture. Now, you can cut the marshmallow with a pizza wheel (which is actually kind of fun).
At this point obviously you can eat them just like they are- in hot chocolate and s'mores and whatnot. 

You will notice that they really truly do taste like marshmallows. This means two things:
1. hurray! you have successfully replicated marshmallows!
2. you have just spent 2 days making something that tastes exactly like a product available for $2 at the grocery store. (but square! these are square! that makes them totally different, right?)

At any rate, do what you will. I decided to make them into a fancy dessert. For this, you need:
1 bag semisweet chocolate chips
1 package of candy canes- crushed in the food processor (or with a hammer, if your arm has recovered)

I recommend covering every available surface with wax paper right about now (especially if you just cleaned up the drifts of powdered sugar)

Put the chips in a microwave safe container. In SMALL increments, melt them. Be aware that microwaved chocolate won't necessarily look melted- sometimes it holds shape despite being melted inside. Always try a stir test before going back in. If you overcook, it will be ruined.

Now set up a little assembly line- dip in the chocolate, then the minty chips, then set on the wax paper to set.
You will become acutely aware of how very many marshmallows that recipe makes by the end.

Let them set, and then enjoy! The marshmallows will keep for 3-4 days in a closed container, and I think these last about that long as well. Some of them will be prettier than others, but they are tasty and definitely look impressive if you want something for a Christmas party.

Good luck, and Merry Merry Christmas!

Tuesday, December 4, 2012

Holiday Treat Time!

Happy December! I'm pretty excited over here because I put my tree up the weekend after Thanksgiving, which seemed a little crazy since it was still November. But, honestly, who cares- if I could have my way and not end up on Hoarders for it, I'd have a tree set up all year long.

While I bask in the glow of my tree (which is actually quite far away since I'm at a conference in a distinctly non-wintery location. Charlotte will have to do the basking this week), I wanted to share some holiday recipes from the archives... this will take a few days so here is the first batch!

1. Not Your Grandma's Brittle: This one include rosemary almond brittle, walnut orange cinnamon brittle, and red curry peanut brittle. Great for gifts!

2. Peppermint Shortbread Cookies: These are shortbread with a twist- seriously delicious!!!

3. Pumpkin Ginger Crumble Pie: Sure it's a little Thanksgiving-y, but since it's a little special, you could use this throughout the holiday season. Mmmm... gingersnap crumbles.

Saturday, October 20, 2012

The Amazing Dairy-free, Soy-free, Nursing Mother Friendly, Vegan Friendly, Fancy Chocolate Baptism Cake

***SPOILER ALERT*** this cake is delicious. it also has avocado in it. I am not even kidding.

So, the worlds cutest nephew (WCN) transitioned to being the worlds cutest Godson/nephew a while ago (this post is really really late, and the WCN in question is now 8 months old and crawling like a mad-man, but I kind of forgot to blog about it all in my post cake baking exhaustion. and I knew it would be long, so it's just been sitting here). Anyhow, I wanted to do something special for the event, and so got recruited to make the cake.

Now, WCN had a very sensitive little tummy, and poor WCN's Mom was on a very restricted diet as a result- this mean no dairy and no soy. She didn't request a cake without those things, but it just seemed like it would be too sad if she couldn't eat the cake. So, a search for an appropriate recipe commenced. A recipe for chocolate avocado cake had been kicking around between some of my fellow bakers and I, so I decided to give it a try. 

The stuff:
3c all purpose flour
6 tbsp cocoa powder
.5 tsp salt
2 tsp baking soda
2c sugar
1/4 c vegetable oil (I used canola in one, and coconut oil in another)
1/2c mashed avocado
2c water
2 tsbp white vinegar
2 tsp vanilla extract

What to do with it:
Preheat oven to 350 degrees, grease your pans (either 2 rounds, or 1 9x13)
Sift together dry ingredients, mix wet ingredients, gradually stir dry into wet.
Bake 30-40 min, but defer to a knife or toothpick if you are making a bigger cake.

Now, I'm not going to lie... I was so anxious about the avocado component that I test drove this recipe twice, both times not telling anyone about the secret ingredient until after they already decided that they liked it. Because this was not going to a vegan brunch, this was going to a big, carnivorous party, and it was going to be the only cake. It turns out there was no need- this cake is VERY moist and very chocolatey. It's not just a good cake considering the constraints on the ingredients, it's a good cake in any scenario. I would make it again, any time.

In addition to being anxious about the flavor, I also wanted this cake to be big and to be fancy (this was the WCNs big day, after all, and there is a big family involved). So, the first step was to make 3 9x13 layers, because there were a LOT of people coming. This thing weighed a ton. 

If you want to know how I came up with that amount, I used a handy-dandy cake portion calculatorThere were going to be ~50 people there, and the calculator said that 2 9x13 layers serve 45. I didn't want to be skimpy, so I made 3, but really, there was probably 1/3 of the cake left in the end, because this cake is very rich.

So, step one was to stack the layers up. A smarter person than I am would have sliced off the rounded top of each layer so that they stacked flatly without gaps on the side. I used a lot of frosting filling in those innocent little gaps you see there.

The next step is a crumb layer that can cover the edge of the cake and make a barrier between the cake (and its crumbs) and your fancy frosting layer. This is also when you fill in those gaps.

Now, I recommend this cake, hands down. I do NOT recommend my attempt at vegan buttercream. I just took a normal buttercream recipe and used Earth Balance. The issue that happened is that my kitchen was very hot (after baking 3 giant cakes!), and the Earth Balance separated at a lower temperature than butter would have and I the frosting started to separate. This required a trip to the store  at 11pm to start all the frosting over, and also involved actually scraping all the frosting off the cake once. So.... I'm not even going to share the recipe, I suggest finding your own.

After the crumb layer was on, I put in some blue food coloring to make it cute.

Now comes a cool trick I learned- I wasn't about to attempt to make fondant, but given that this was supposed to be fancy I wanted the buttercream to be smooth. I learned that the trick you do is to use paper towels. It sounds weird, but it totally works. Now, if you want completely flat buttercream you need completely flat paper towels, which is actually harder than you think. Viva brand paper towels are totally flat though, so just go for those. If you find a design you like, you can actually make little imprints in the frosting. Of course, I was not about to try this out on the actual cake without testing it first (and, I'm a scientist! obviously I had to test both methods). So, before putting the higher layers on, I tried it on layer 1. These pictures are not that great, but it was almost midnight at this point, so lets just say that lighting was not my top priority.
Basically what you are doing here is "ironing" the frosting, so get something flat. I'm sure there is something more more professional than a tea box, but, it works. Side note- that's my favorite tea.
This is the "viva" paper towel version- so flat!
This is the regular paper towel version, I think this pattern could actually be kind of cool but it would be REALLY hard to implement it well, in terms of matching up seams, getting it even, etc. (also, you can see here that the earth balance buttercream is starting to break down, this is right before I started over with that).

So, after frosting it with blue frosting, 'ironing' it, I made some darker frosting and put it on using a pastry bag. And here it is! 
You can see how the edges are wobbly, if I had sliced the layers so they laid flatter, that wouldn't have happened. I learned a lot though, and will definitely be trying this whole frosting technique again.

AND... noooobody had any idea about the avocado,  my sister and law could eat it, and everyone was happy!

To sum up an excessively long post:
1. this cake recipe is delicious, and I would try it whether or not it needed to be vegan
2. this technique for making buttercream frosting smooth works- it doesn't look like fondant, but it does look better than regular buttercream
3. nephew status: successfully baptized, and adorable

Wednesday, August 29, 2012

Turkish Delight, a Cooking Disaster from the Archives, and a Big Location Change

Since my last post I have had a MAJOR change of location... new job, new city, and a new coast. I'm still up to all the same old things though, so, no big changes around these parts.

BUT, one thing that has changed is that my new location comes with the most amazing, awesome, exciting grocery store I have ever seen (did I just call a grocery store exciting? yes. yes I did). It's like every little ethnic grocery store I used to go to in LA is combined in to one place. I probably could have browsed for hours. Among other things, I got cactus fruit (3 for a dollar! how do you eat it? I don't know yet!), ripe plantains, fresh feta, fresh pita, giant Peruvian corn, some Peruvian chile purees (now I just have to make my sister-in-law teach me to use them!), amazing tabouli, AND freshly made Turkish Delight.

Now Turkish Delight has a special spot in my heart, dating back to the days when I first read The Lion, The Witch, and the Wardrobe and Edmund was lured by the White Witch with huge amounts of Turkish Delight (yes, I read those books many many times. No, I did not see the movies- I watched just a few minutes of the first one, saw the witch had the wrong color hair, and decided to turn it off in case it ruined the books for me). Anyhow, I had no idea what it was, but it sounded so mysterious and amazing. To be honest, in my head, it was basically exactly like the inside of a Butterfingers bar. Who knows where I got that idea, but when forced to come up with the most delicious thing I could think of, that's what I got (mmmmmmm, Butterfinger)

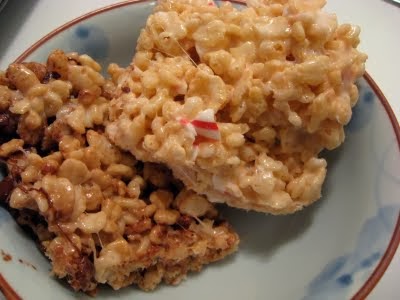
So, a year or so ago, I heard about someone MAKING Turkish Delight, and was completely intrigued. I found out, at that point, that it's NOT even remotely Butterfinger related, but it's a delicate jelled sweet cut into cubes and dusted with powdered sugar. See how it is smooth and almost gooey?

I was excited to try it, so I proceeded. The recipe I found called for:
- 4c sugar (granulated)
- 1.25 c cornstartch
- 1 tsp cream of tarter
- 1 tbsp lemon juice
- rosewater (which I didn't have)
- 1 c powdered sugar
- a bit of vegetable oil

The recipe ALSO required a candy thermometer, but mine was broken. This was my first mistake. I have been making English Toffee, peanut brittle, fudge etc for years, and am at the point with those that I can actually do a pretty good job even without the thermometer. So, feeling like I had a good handle on the cooking stages, I proceeded anyways. This might have been ok if I had ANY idea what texture I was going for.

You can see the recipe I followed here, but given my results, I'll leave it to you to find the recipe you want to use (of course, all mistakes are mine and don't reflect on the recipe at all). Essentially you cook the water, sugar, and lemon juice until it reaches 240, then combine with a lightly cooked cornstarch mixture. Easy-peasy, right?

This was mine. I used food coloring to try to get a delicate pink color, but as you can see it just turned red (second mistake).
Looks ok, right? it just poured right in! At this point I was pretty pleased with myself.

Now, you are supposed to let it cool for 24 hours. With intense anticipation, that's what I did. Then you're supposed to invert it and slice. Mine would not invert. I pounded, I banged, I ran hot water over it. There was no way it was coming out of that pan on it's own. So, I decided to slice it in the pan.

As you can see, I finally managed to hack out a corner. In case you didn't notice, this does NOT look like the stuff I bought today.

At this point, I realized I'd gone astray, so I decided to toss it and start over. HA! I don't know what I made, but whatever it was, it took THREE DAYS to soak it out of the pan. Maybe it was the cornstarch, I don't really know, but I truly believe that that stuff could be adopted by the government to make shields, or buildings in war zones, or bomb proof boxes.

Not to be thwarted, once the pan was finally clean, I tried again.

This time, as you can see, I cooked it a little less and got a substance with a little more mobility- it would at least bend, but it was very very hard. This one could have been adopted by the American Dental Association as some kind of magical filling/crown remover- I was afraid to even chew on it.

I finally gave up. I always meant to try again, and never posted these pictures because I wanted to wait until I did it right (kind of like one of my other cooking disasters, the infamous Dulce de Leche) Now, fortunately, thanks to my move, and to the magical grocery store, I don't have to! I can't say I'm not relieved.

So, Turkish Delight. If you manage to make it work, let me know- best of luck, I'll finally be moving on!

ps. If you're want some evidence to back up my strong feelings about the Witch's hair, here it is ;-).
The real witch:
This is from my (probably 'vintage' by now) book, which I unearthed while moving. It's night, so I couldn't get the overall color right, but you can see the hair is clearly black.

The movie witch:
The amazing Tilda Swinton. With the wrong color hair.


Saturday, June 23, 2012

Coconut Sorbet and Homemade Magic Shell (Vegan!)

Imagine the magic of a childhood treat... cold refreshing ice cream with a crunchy shell that you have to  crash through with your spoon to take a bite. Ahhhhhh.... Magic Shell! 

Now, somehow my adult self has avoided Magic Shell just because it seemed like there was no way something like that didn't have a million scary and bizarre ingredients. Then thanks to my good friend Pinterest, I found out you can make it yourself, at home, with only 2 simple ingredients.

Honestly, I'm not sure I am prepared to wield that kind of power.


But, now that I know this amazing secret for myself, who am I to keep it from you. So, here it is.

The pin I found for the topping was from the blog AlphaMom, and it looks like there is plenty of other good stuff to be found over there. But, first, I'm going to fill you in on the sorbet itself, because it's pretty amazingly simple as well.

Sorbet- what you need:
2 cans coconut milk (I used 1 whole fat and 1 light)
1/2 c shredded coconut
1/8 c sweetener (sugar or agave)

What to do with it:
Hang onto your hats, this is pretty complicated. Dump all the above ingredients into your trusty ice cream maker. Push "go". When it seems to be pretty well frozen, scoop it out and put it in the freezer in a tupperware. That's it!

"Magic Shell"- what you need:
1 1/4 c chocolate chips (if you want this to be vegan, then do your due diligence on your chip selection)
1/2 c coconut oil

What to do with it:
This is also VERY VERY COMPLICATED. Put the chips and oil together in a bowl in the microwave, and run for 1 minute or so until it's melted. Let it sit a minute then stir until totally combined. It's pretty runny at this point, but when you pour it over the ice cream it'll freeze right up!


This whole thing is kind of genius... basically, it's all capitalizing on the fact that coconut has a really interesting melting point (around 76 degrees). So, it you warm this up just a bit, it's melted, but as soon as it cools, it solidifies. You can keep it in the fridge and then warm it up a bit so you can pour some off to serve.

Overall, the coconut sorbet itself isn't too sweet, which makes it kind of nice and refreshing- plus, it's rich enough from the coconut milk to seem decadent without needing a lot of sugar. And seriously, there is something about whacking the chocolate sauce with the spoon that's just fun, that's all there is too it.


Saturday, March 24, 2012

Strawberry Frozen Yogurt... A Little Hint of Summer!

Basically, like everyone else these days,  I've become completely addicted to Pinterest. I'm there under *(what else) yellowfish - come check me out, or leave me your name and I'll follow you.

One of the things I pinned recently was this awesome looking strawberry frozen yogurt I found on Pink Parsley


Looks delicious, right?? And when you read the ingredients, it gets better- Greek yogurt, strawberries, lemon and sugar. Couldn't be easier!

Here's what you need:
2c Greek yogurt- I used regular plain, but I think you can also use low fat
1 lb fresh strawberries, diced
2/3c sugar (next time I'll use 1/2c)
juice of 1 lemon
zest of 1 lemon
2 tbsp alcohol (vodka, triplesec)


What to do:
Chop the strawberries up, squeeze the lemon in the bowl, zest the lemon and add to bowl. Let it sit for about half an hour while the juices release.

Put the strawberry mixture in the blender, add alcohol (I used triple sec because it has a citrus flavor- the reason it is in there is really not for flavor so much as to keep everything from becoming a block of ice in the freezer). Blend well, then add yogurt and blend everything together. Pour mixture into the chilled ice-cream maker. Then, let it go until it becomes firm, then put into freezer to chill further.


What is so great about this is, #1 the beautiful color :). But, in addition, with all the fruit, it's almost on the border between an ice-cream and a sorbet. The fruit flavor and the lemon really come through and it's really fresh and light and summery. Plus, with the Greek yogurt, there is protein and while it's not really guilt-free due to the sugar, it's definitely a better choice than ice cream. Plus, it's delicious- give it a try!

Monday, January 2, 2012

The Crowning Achievement- Kransekake

Ok, since it's actually a national holiday associated with New Years, I'm going to count this as squeezing in the last post of 2011 since it was pretty much one of the crowning baking achievements of the year.

What we have here is a Norwegian Kransekake, a special ring cake made with almond flour. Now, we have been trying for YEARS to get this thing right. This has involved interrogating many older Scandinavian relatives to try to deduce their secrets, as well as lot of swearing and cursing at collapsed falling apart leaning-towers-of-kransekake. Everyone has their secret- blanch the almonds, don't blanch the almonds, dry the almonds, use a nut grinder, use a coffee grinder, buy almond flour, use a food processor, and on and on. We've been getting closer, but it's still kind of like the Russian roulette of holiday treats.

But, this year, I decided just to google it, and low and behold, I found a recipe that seemed really different from everything we had done before.
http://scandinavianfood.about.com/od/cakerecipes/r/basickransekake.htm

Now, my first note is the hilarity of the idea that this takes 1 hour and fifteen minutes of total cooking time. HA! This is definitely a much longer project than that, at least to a novice kransekake-er like myself.

This is my edited version:


Ingredients For Cake:
.5 lb raw almonds (from Trader Joe's)
.5 lb blanched almond slivers (also from Trader Joe's)
1 lb. confectioner's/powdered sugar
3 egg whites
2 tsp. almond extract
2 Tbsp. mixture corn starch and regular flour (you're supposed to use potato starch flour but I couldn't find it)

Ingredients For Frosting:
3-4 cups confectioner's sugar
1 tsp. almond extract
1 tsp. lemon juice (or as needed)

The first thing to do is grind your almonds- do NOT use a food processor, use a coffee grinder (I ground up some oatmeal in mine first to get rid of residual coffee). This took me about 15 minutes, there is no way around doing small batches. Mix together all the almonds along with the powdered sugar, and then put it through the grinder again (which also takes a while!). Put it in a saucepan and stir in the almond extract and the egg whites, it should be very firm. Then "use a wooden spoon to knead the dough over the heat until it pulls away from the sides of the pan and shapes itself into a smooth, shiny mass (this step is exactly like making homemade play dough; the resulting almond paste is also the consistency of play dough)." Then refrigerate overnight.

The next morning, have a giant cup of coffee and then proceed.

Preheat the oven to 400, and then butter your special kransekake pans (I have no idea where my Mom got these) and dust with the flour mixture.

Now the fun starts- take chunks of dough and roll them into 1/2inch wide snakes (long snakes!) and fit them into the ring molds. I recommend doing a couple of single test rings first to see how wide they should be- if they are too skinny, the middle won't be chewy but if they're too fat, they'll spill over and they'll all get stuck together.

Bake about 15 minutes, they should be very light brown. Watch carefully though, this depends a lot on how fat they are, and you don't want to overcook them.

Once they cool a bit and you remove them from the pans, set aside some time to leap around the kitchen in joy, then proceed onwards. Now, it's time to focus because you have to stack all the rings up. We'd never actually had this many rings turn out so it was harder than we thought, plus we had some extra dough so there were duplicates in there (that's when it's good to have an engineer in the family, so we called in my brother).

Once you've figured out the order, time to glue! Make the frosting mixture (mine was a very unscientific process of combining powdered sugar and lemon juice until it seems like a good consistency. Then scoop it into a plastic baggy and cut a TINY hole in the corner (TINY! TINY! must be tiny!). Glue the first ring to the plate with frosting, and then create a zigzag pattern all around the ring, and place the next one on top. This is why you want to know the order before doing this, if you have to stack and unstack with frosting on it it'll be a colossal mess.


Then, just keep going!

Once you're done, it's traditional to decorate with little flags (we used Swedish, Finnish and Norwegian just to represent the whole family), or use whatever you want! enjoy!


Monday, December 19, 2011

Peppermint Shortbread Cookies- Put These on Your Christmas Baking list ASAP!

Oh... these are good. I'm not gonna lie, you probably should skip to the recipe and go make these immediately, then finish the post while munching on them.

I must confess, these were not actually my own idea. Yesterday we went to The Trails Cafe, which is a cute little place right in the middle of Griffith Park. Along with this amazing avocado sandwich, we also had the daily special, a peppermint shortbread cookie.

The only thing was, while it was pretty delicious, I didn't feel like it was quite pepperminty enough. So, I set to work. I found Ina Garten's shortbread cookie recipe and went from there. 

3/4 pound butter (unsalted)
1c sugar
1 tsp vanilla extract
3.5c flour
1/4 tsp salt

AND

10 full sized candy canes

Preheat the oven to 350. While it's heating, put the candy canes in a food processor (or, I guess, hit them with a hammer or some other creative solution). The pieces should be very small, big chunks will melt and spread when the cookies bake. Cream the butter and sugar together really well. Add the vanilla and salt and mix well, then stir in the candy cane powder/pieces.Then gradually add the flour- the dough will be a bit crumbly. Smush it together and wrap in plastic wrap. Set in fridge to rest for about half an hour.

When it's ready, roll it out. I made mine a bit thin, you should remember that there is nothing in these cookies that will make them rise (no eggs, baking soda, etc), so they will essentially be exactly the same thickness as they are when you put them on the cookie tray.

The recipe says to make them half an inch thick and bake for 20-25 minutes. You should probably watch the first batch carefully, since mine were relatively thin (which actually tasted good and crispy in the end) they only took about 17 minutes. You don't want them to be too brown, the edges should just barely be getting brown. When they look good, put them on a cooling rack and get ready to enjoy!


NOTE 12/13/13- since posting this, I tried again to make these cookies, and it did not go well. They spread out all over the sheet and generally looked like a crazy flat weird mess. Not to be deterred, I tried again. It turns out it is CRITICAL to let the dough chill. This time, I rolled it into a log, covered it in saran wrap, and put it in the freezer for at least half an hour. Then, I just sliced the cookies (which after all, is easier than rolling anyways!). The remainder of the dough went back in the freezer. In addition, I would slightly reduce the number of candy canes to 8. When you blend them in the food processor you end up with some amount of candy cane dust, which then acts just like sugar, and melts and can cause them to spread. I also baked them on parchment paper- do NOT grease the cookie sheet. Good luck!

LinkWithin

Related Posts with Thumbnails