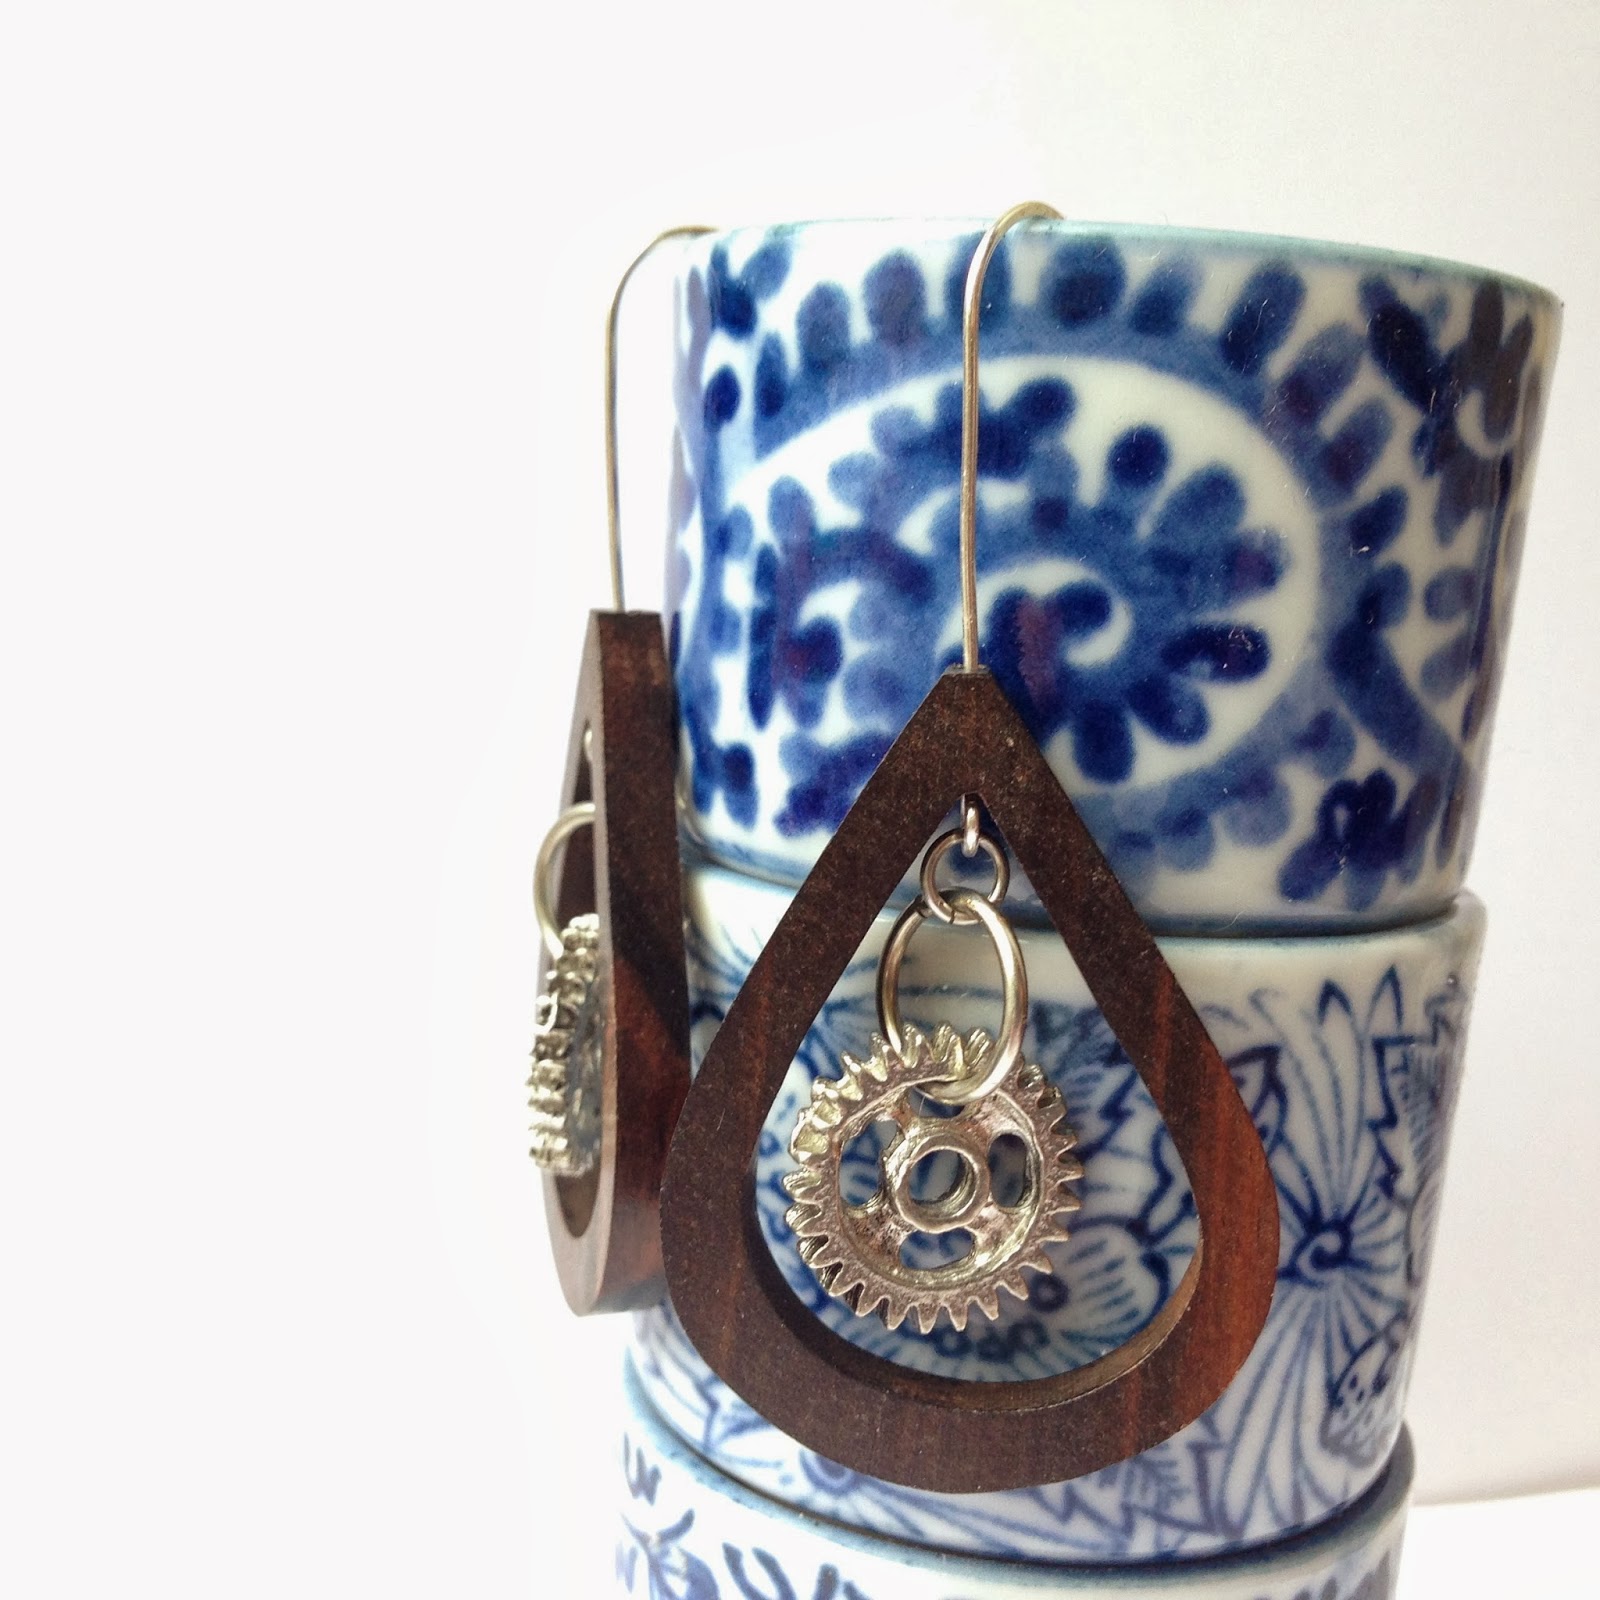
I've made a lot of different versions of these over the years, my friends call them "the yellowfish earrings", and one of the reasons I like them is because even after selling them for years I still haven't seen much else like them. I also like them because the overall design is amenable to so many different versions- the "gear drop" design, which I've made a few different iterations of, is probably my favorite.
Showing posts with label jewelry. Show all posts
Friday, March 20, 2015
Etsy Shop Reboot II: Teardrop Series
I mentioned in my last post that I started my etsy shop back up again, so I figured I'd take the chance to highlight some of my favorite stuff. This whole line of wooden teardrop earrings includes some of my favorites, they're all listed as part of the "Teardrop" series.
Sunday, March 15, 2015
Etsy Shop Revamp
Well, this week I decided to dust off my long defunct etsy shop... I've run out of walls in my apartment to art projects for, and run out of furniture to paint, so I need some way to make things to avoid going crazy. I'll probably put up a few posts highlighting some of my favorite sets of things that are up there. Take a look!
In this post I want to show you this really basic line of small hoops. Basic, but super comfortable and useful!
These little pearl earrings are my some of my favorites, and also the thing I've sold the most of. Everyone who's gotten them loves them. The reason I like them is that they're kind of fancy but as a non-pearl-stud-type-person the hoop makes them feel more casual. They're also totally comfortable, you can sleep in them, talk on the phone, whatever.
After I liked those so much, I made a series of different versions. They're listed in the shop as the "Simplicity" series.
Sunday, November 30, 2014
DIY Cookie Rack Jewelry Rack: Still Alive and Kicking
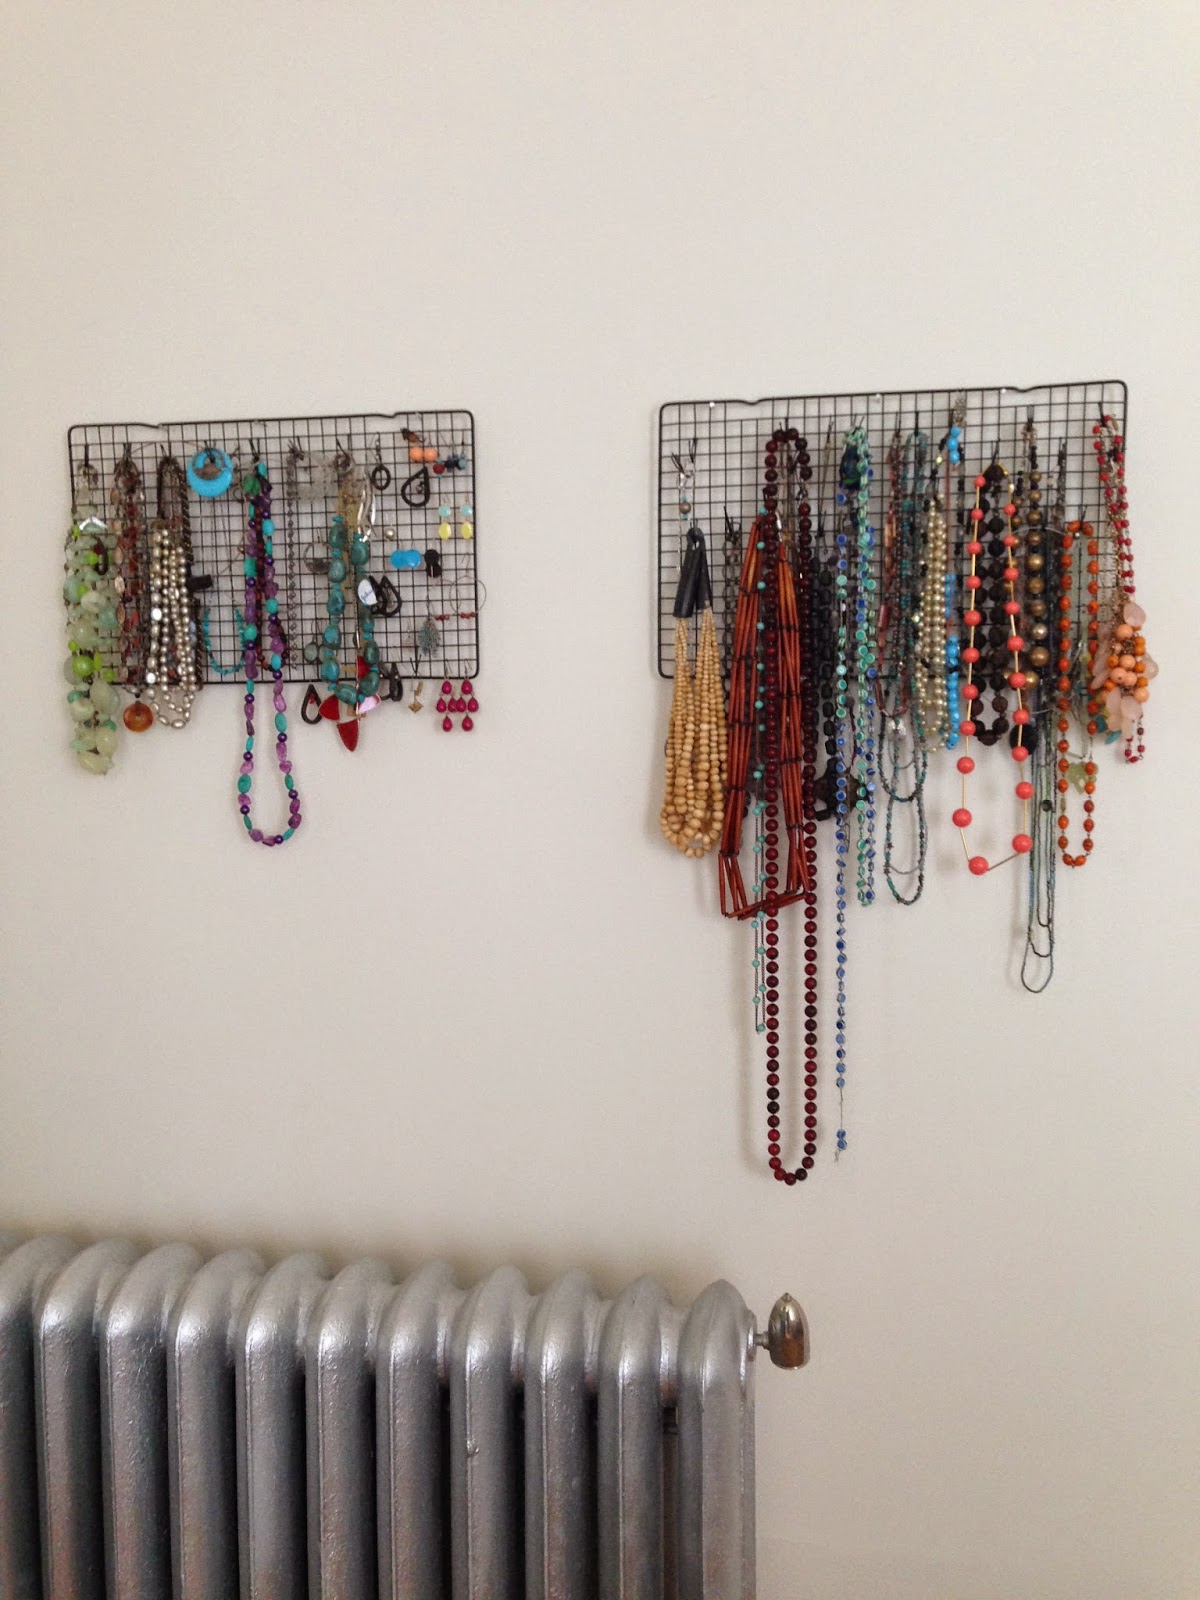
I think of all the things I've hacked together in the name of decorating, these jewelry racks made from kitchen cooling racks and bobby pins must be the most successful, because I have dragged them from apartment to apartment and I still love them. (Also, I have a necklace addiction problem, clearly).
It started out way back in 2010
Then it stuck around in 2013
And, it's still kicking!
Totally worth the 5 bucks I spent on supplies, by a long shot!
Sunday, October 6, 2013
Yellowfish Shop is Starting to Get Ready for the Holidays!
I went shopping for jewelry supplies recently, which was fun in the Garment District when I lived in LA, but is much more fun in NYC's Fashion District because I can harbor the secret hope that maybe, just maybe, I will run into Tim Gunn. Unfortunately, I'm pretty sure that whatever he is doing is much more fabulous than obsessively digging through strand after strand of beads, but hey, a girl can dream.
I'm starting to fill up the shop for the holiday season and thought I'd show you a few of the new things that you'll find over there!
Saturday, September 7, 2013
Easy Homemade Hanging Jewelry Rack (repost)
As another decorating re-post, here is a jewelry rack, made out of cooling racks! this has now moved coasts and apartments and is still going strong. This probably goes down as the single most useful thing I have ever made. Somewhat ironically, my actual cooling racks for food were lost in the move, so the only ones I own are nailed to the bathroom wall- I guess you win some, you lose some.
___________________________________
This idea came to me in a craft store, here is what you need for a little do it yourself action:
--a gridded baking cooling rack (preferably black)
--a package of black bobby pins
--needle nose pliers, or round nose jewelry pliers
--decoration, if you want (here, some discount Christmas berries. I also considered ribbon woven around the edge).
Here is the finished product... so far, it is working fantastically! Its not only cute, it was veeery budget friendly. give it a try!
And- a year later, here it is (way loaded up) in its new home!
___________________________________
This idea came to me in a craft store, here is what you need for a little do it yourself action:
--a gridded baking cooling rack (preferably black)
--a package of black bobby pins
--needle nose pliers, or round nose jewelry pliers
--decoration, if you want (here, some discount Christmas berries. I also considered ribbon woven around the edge).
Take the rack, and put whatever decorations you plan to use on it first- this works better for things like the berries so that you can place your hooks around them.
To create the hooks, take a bobby pin, and, from behind the rack, clip it onto one of the horizontal bars, so that its hanging straight down on the front. Then, take your pliers, and grip halfway up the bobby pin. Bend the bobby pin upwards so it forms a V pointing up, making a hook. You can space the hooks out as you want- I found that leaving an empty square between them helped a lot when hanging things.
For necklaces, be sure to leave enough space between rows for the pieces to hang. I made one square for necklaces and the other for earrings. On the earrings rack, I put a series of hooks at the top for hoops, and the other earrings I just hung through the squares by their hooks.
Once all your hooks and decorations are installed, nail it up!
Here is the finished product... so far, it is working fantastically! Its not only cute, it was veeery budget friendly. give it a try!
And- a year later, here it is (way loaded up) in its new home!
Sunday, March 3, 2013
A few new things in the shop!
Well, the title pretty much says it all...
First up, this little fish, which I realized is yellow and I should probably keep for myself as my mascot, but for now, it's up there!
Then there is this necklace, which I actually made out of old watch pieces that I bought when I was making my Steampunk Butler Munny
And finally a new version of my teardrop line of earrings, but instead of beads, made with more little gears
There are a few more....go on over and check it out!
First up, this little fish, which I realized is yellow and I should probably keep for myself as my mascot, but for now, it's up there!
Then there is this necklace, which I actually made out of old watch pieces that I bought when I was making my Steampunk Butler Munny
And finally a new version of my teardrop line of earrings, but instead of beads, made with more little gears
There are a few more....go on over and check it out!
Monday, March 12, 2012
New Listings, Check it Out!
Recipes are forthcoming (I had the most delicious Thai turkey sliders for dinner, mmmm), but in the meantime, I've been busy! Check out some new listings over at yellowfish!
Tiny ladybug earrings... yes, green ladybugs! I love them.
I've been waiting to figure out what to do with these really pretty long wooden beads- I finally figured that simpler was better, and this is the result.
I also added a few to my wooden teardrop series- I think these cloisonné earrings are my favorite of the batch.
And finally, some necklaces...
This one is just big and bright and shiny and fun, and I kind of wanted to keep it for myself
And this one is much simpler, and almost verging on a little steampunky with the chunky chain and wooden bead.
Tuesday, October 4, 2011
Bliss.
Well, it's been pretty busy around these parts. Among other things, I had a grant deadline situation going on (my second ever R01, for those of you who might be interested, and for the record it was WAY WAY less traumatic than the first one).
Fortunately, I finished that sucker right around 6:30, which allowed me to come home to an evening of leisure, in which I'm pretending that none of the other things I have to do now that the deadline is over exist.
I will give you a glimpse of my evening in photos...
#1. Magic Hat #9- I kid you not, I have been looking for this beer on the West Coast for almost 10 years (aka, ever since I moved from the East Coast). After completely giving up, I had a miraculous experience in Whole Foods (which I mainly go to for the bulk grains aisle) in which the heavens opened up and a beam of light shone down on the ONE BOTTLE of #9 they had. I brought it home, swaddled in reusable shopping bags, and have been saving it for this very day. I almost had some weak moments, but am I ever glad I made it through. I am sipping it and basking in memories of my youth.
#2 There is a missing picture here of my gnocci, kale, pesto, and (veggie) sausage dinner, but I assure you it was both delicious and photogenic.
Fortunately, I finished that sucker right around 6:30, which allowed me to come home to an evening of leisure, in which I'm pretending that none of the other things I have to do now that the deadline is over exist.
I will give you a glimpse of my evening in photos...
#1. Magic Hat #9- I kid you not, I have been looking for this beer on the West Coast for almost 10 years (aka, ever since I moved from the East Coast). After completely giving up, I had a miraculous experience in Whole Foods (which I mainly go to for the bulk grains aisle) in which the heavens opened up and a beam of light shone down on the ONE BOTTLE of #9 they had. I brought it home, swaddled in reusable shopping bags, and have been saving it for this very day. I almost had some weak moments, but am I ever glad I made it through. I am sipping it and basking in memories of my youth.
#2 There is a missing picture here of my gnocci, kale, pesto, and (veggie) sausage dinner, but I assure you it was both delicious and photogenic.
#3. Yep, I made MYSELF some earrings for once!
#4. I'm unstoppable! Pair #2! All for me! (pictures aren't that great because I was too lazy to get my whole setup organized).
#5. And, I'm ending the evening with my dear old friend (and, possibly some amazingly crappy television that you don't even want to know about).
What a night! As I said... bliss....
Sunday, February 27, 2011
Etsy Shop Update- A New Direction!
But, recently I've been having some fun playing around, and have a new line of pieces with just a little more edge. With the addition of some gears, and some darker metal, the new pieces are a little edgy, and just have a little bit of a steam punk like feel, which is kind of fun.
Check it out!
But, never fear... the new things haven't replaced any of my old favorites- in particular, my best sellers, the line of tiny pearl earrings (I have a pair and seriously have worn them pretty much everywhere), and the Tear Drop series of wooden earrings with various beads.
Anyways, just thought it'd be fun to share my non-cooking activities of late!
Wednesday, December 15, 2010
100th Sale!
Hurray! I finally reached the 100th sale in my etsy shop!
I think in celebration, I'll have a holiday giveaway... if you comment on this post letting me know which piece in the shop is your favorite, you can win a pair of the teardrop style earrings (with whichever beads inside you like best).
I'll draw a winner on Christmas Eve!
I think in celebration, I'll have a holiday giveaway... if you comment on this post letting me know which piece in the shop is your favorite, you can win a pair of the teardrop style earrings (with whichever beads inside you like best).
I'll draw a winner on Christmas Eve!
Friday, September 10, 2010
Something Different: DIY Jewelry Rack
So, I make jewelry. The reason I started selling jewelry, was partly that I have more necklaces than any normal person needs, had given them to everyone I know for presents, and needed a new outlet. So, I now have things to do with the new necklaces, but my own collection is still stuck on a series of hideous overloaded hooks. The two main problems with the hideous plastic hook system were that they were constantly tangled and I that couldn't see them all.
This idea came to me in a craft store, here is what you need for a little do it yourself action:
--a gridded baking cooling rack (preferably black)
--a package of black bobby pins
--needle nose pliers, or round nose jewelry pliers
--decoration, if you want (here, some discount Christmas berries. I also considered ribbon woven around the edge).
Here is the finished product... so far, it is working fantastically! Its not only cute, it was veeery budget friendly. give it a try!
This idea came to me in a craft store, here is what you need for a little do it yourself action:
--a gridded baking cooling rack (preferably black)
--a package of black bobby pins
--needle nose pliers, or round nose jewelry pliers
--decoration, if you want (here, some discount Christmas berries. I also considered ribbon woven around the edge).
Take the rack, and put whatever decorations you plan to use on it first- this works better for things like the berries so that you can place your hooks around them.
To create the hooks, take a bobby pin, and, from behind the rack, clip it onto one of the horizontal bars, so that its hanging straight down on the front. Then, take your pliers, and grip halfway up the bobby pin. Bend the bobby pin upwards so it forms a V pointing up, making a hook. You can space the hooks out as you want- I found that leaving an empty square between them helped a lot when hanging things.
For necklaces, be sure to leave enough space between rows for the pieces to hang. I made one square for necklaces and the other for earrings. On the earrings rack, I put a series of hooks at the top for hoops, and the other earrings I just hung through the squares by their hooks.
Once all your hooks and decorations are installed, nail it up!
Here is the finished product... so far, it is working fantastically! Its not only cute, it was veeery budget friendly. give it a try!
Thursday, September 3, 2009
Little flowers- summer in your ears!
Ok, to wrap up my end of summer series, here are a couple pairs of earrings I've made recently. I'm not normally a super flowery person, but these little beads were just so cute I had to use them for something.
First up, Hanging Garden Earrings, which are lightly hammered sterling silver curls spiraling down with little orange and white flowers on them.

And next, the Little Bite of Spring earrings. Now, these have a little story- basically, the 'stems' are repurposed out of a necklace I got while I was in Japan. When I got it, I had no idea what it was made of- it almost looked like silk cord, it had such an interesting blue green texture. Then, when I accidentally broke it, I realized that it was really made out of very very teeny tightly wrapped springs. (if anyone knows what this is called, I loooove it and would love to buy some, but I don't know how because I have no idea what it is called). So, I thought it was perfect for these little stems because it gives an otherwise really simple pair of earrings a sort of interesting texture.
First up, Hanging Garden Earrings, which are lightly hammered sterling silver curls spiraling down with little orange and white flowers on them.
And next, the Little Bite of Spring earrings. Now, these have a little story- basically, the 'stems' are repurposed out of a necklace I got while I was in Japan. When I got it, I had no idea what it was made of- it almost looked like silk cord, it had such an interesting blue green texture. Then, when I accidentally broke it, I realized that it was really made out of very very teeny tightly wrapped springs. (if anyone knows what this is called, I loooove it and would love to buy some, but I don't know how because I have no idea what it is called). So, I thought it was perfect for these little stems because it gives an otherwise really simple pair of earrings a sort of interesting texture.
Thursday, April 16, 2009
Something Old, Something New
Well, its been a little hectic and I haven't been posting much, but I'd like to bring you a few brief updates...
1. I know you were waiting on the edge of your seat, so I've got to report that I finally was able to make the Miso Glazed Saki Drenched marinade with fish (which is what I was going for in the first place- you can see the recipe at the old post). I didn't have cod, which is what I think would be best, but I got frozen Mahi Mahi from Trader Joes with met my 2 main criteria- 1. it was not break the bank expensive, and 2. it was one of the few varieties of fish I can actually stand. I think overall, it went pretty well, it definitely has delicious potential. The one thing I'd say is the fish seemed to soak up a lot more of the miso, which did make it seem a bit on the salty side. So, for fish, I think I'd up the amount of Mirin, and decrease the amount of Miso. But, it was tasty, and here is the glamour shot...

2. And, big news item #2 is that I made a new series of pendants that I'm kind of into... and, here one is! (you can see more info here)
1. I know you were waiting on the edge of your seat, so I've got to report that I finally was able to make the Miso Glazed Saki Drenched marinade with fish (which is what I was going for in the first place- you can see the recipe at the old post). I didn't have cod, which is what I think would be best, but I got frozen Mahi Mahi from Trader Joes with met my 2 main criteria- 1. it was not break the bank expensive, and 2. it was one of the few varieties of fish I can actually stand. I think overall, it went pretty well, it definitely has delicious potential. The one thing I'd say is the fish seemed to soak up a lot more of the miso, which did make it seem a bit on the salty side. So, for fish, I think I'd up the amount of Mirin, and decrease the amount of Miso. But, it was tasty, and here is the glamour shot...
2. And, big news item #2 is that I made a new series of pendants that I'm kind of into... and, here one is! (you can see more info here)
Thursday, July 3, 2008
Hammer Time, Part Deux
So, I previously posted about my growing obsession with hammered sterling, maybe because at the end of a long day its nice to come home and disturb all my neighbors by flattening things on my teeny anvil. Its the little things, really.
Anyhow, I really like how the pieces that come out are still sort of organic looking, but have the shine and durability of sterling. Anyhow, I've been doing some more of that lately, and here is whats come out...


Additional pictures and such of many of them are available at my shop.
Anyhow, I really like how the pieces that come out are still sort of organic looking, but have the shine and durability of sterling. Anyhow, I've been doing some more of that lately, and here is whats come out...
Additional pictures and such of many of them are available at my shop.
Subscribe to:
Posts (Atom)